Product Option Manager
Overview
The oomph Product Engine application allows products to have multiple configuration options. The Product Option Manager allows you to manage the options available for each product and the values contained within each option.
Accessing the Option Manager
- Open the oomph Product Engine application from the Shopify apps list
- Click the Product Options link in the top menu bar
-af64e98fc9ffb2f0783c4626cbcca1d1.png)
Archived Options Overview
In the top-right corner of the option manager, you will see a checkbox allowing you to view Archived options. As product options change over time, you may no longer have the ability to offer a specific option. In this case, you can Archive the option. If you wish to view archived options, check this box and the options will be visible within the Option Manager.
When an option has become archived, the following will occur:
- The option will no longer be shown on the front-end of your Shopify store, so customers will not be able to configure their products with that option
- The option will no longer appear in Draft Orders (existing draft orders will still show this option, but you will not be able to modify line items with this option)
- The option will not be recognized in new product upload files
- The option and all configured SKUs using it will no longer appear in the Product Editor
Adding a New Option
- Scroll down the options list and click the New Option button
- In the dialog box that appears, you will need to enter the following information:
- Display Name - the name of the option; this will be referenced within the oomph Product engine application
- Option Handle - the handle of the option; this should be the name of the option in all lowercase letters with all special characters and spaces replaced by hyphens. For example, “Seat Depth” would be “seat-depth”
- Uses Base/Custom Values - must be checked if the value on the Shopify front-end should be replaced with a Base/Custom schema. This is rarely needed and would only be required if the list of values is likely to exceed 100.
- Click the Add button
-199c0d10588711b3032059b2f0ebb5f6.png)
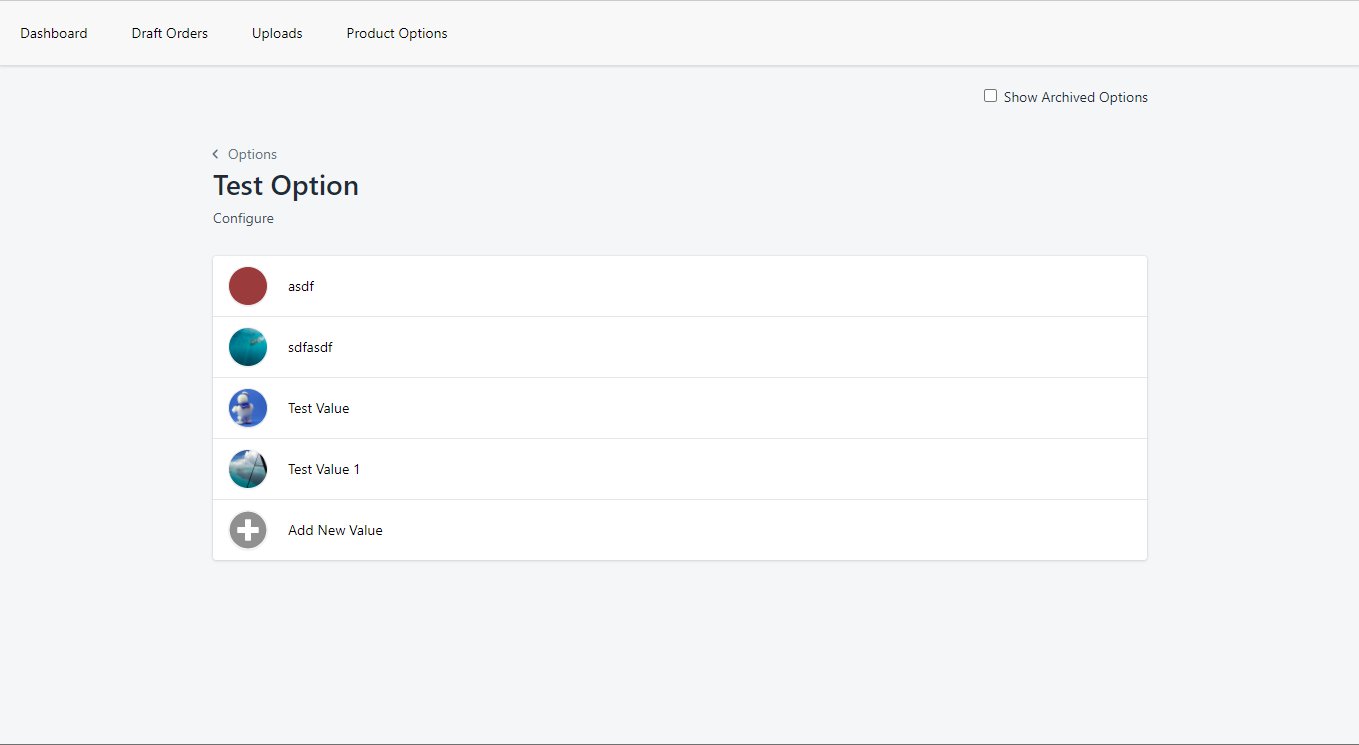
Viewing an Option
To edit an option or the values within that option, you will need to open the option in the Option Editor. To do so, click on the option in the Options list. A new page will open with the name of the option displayed, along with a link to configure the option and a list of the available values within that option.
Configuring an Option
Configuring an option will allow you change several properties of the option, such as the Display Name and Option Handle. To configure an option:
- View the option if it is not already open
- Click the Configure link displayed below the option name
- In the Configuration dialog, you will be able to view the configuration details of the following fields:
- Display Name - the name of the option; this field can be updated
- Option Handle - the handle format of the option name; this field can be updated
- Shopify Option Name - the formatted name of the option used within Shopify; this field cannot be updated
- Uses Base/Custom - must be checked if the value on the Shopify front-end should be replaced with a Base/Custom schema; this field can be updated, but will not affect previously created products
- Once you have updated the properties for the option, click the Save button to update the option within the application.
-5aa2e3d72fc69dc27a2d1807d0e88503.png)
Adding a Value
Configuring a value will allow you to change the value’s information, such as title, swatch image, color, and handle. To configure a value:
- View the parent option if it is not already open
- Click the Add New Value link
- In the New Value dialog, you will need to enter values for the following fields:
- Value Name - the name of the value
- Value Handle - the name of the value in handle format; by default this field is automatically generated based on the Value Name, but can be overridden by changing the value
- Swatch Color - the HMTL color code used by the Shopify storefront for the value; will be ignored if a Swatch URL is specified
- Swatch URL - the image link used by the Shopify storefront for this value; you can upload a new image file or paste an existing URL
- Click the Add button to create the new option
-f74a1220a39112804cee1f9d38a2122e.png)
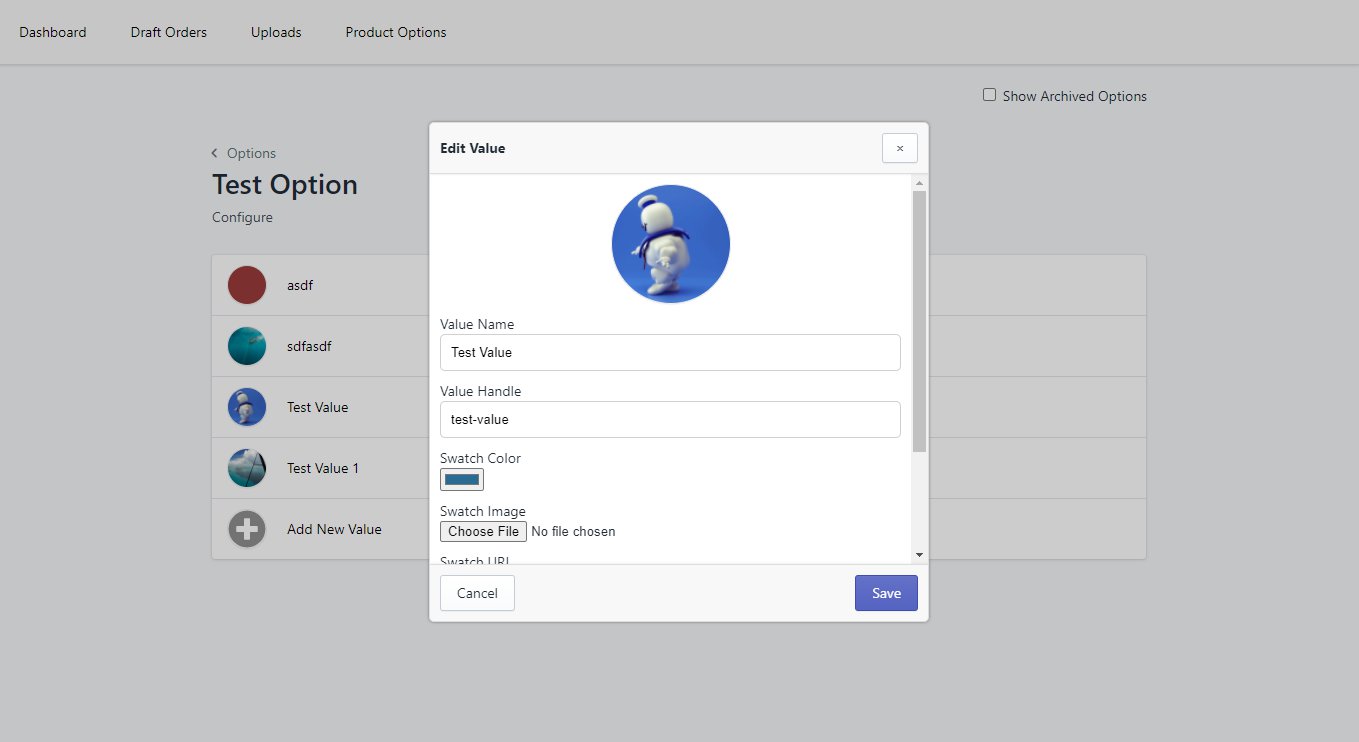
Configuring a Value
Configuring a value will allow you to change the value’s information, such as title, swatch image, color, and handle. To configure a value:
- View the parent option if it is not already open
- Click the value you wish to edit in the Values list
- In the Edit Value dialog, you will be able to view and/or modify the following fields:
- Value Name - the name of the value; this field can be updated
- Value Handle - the name of the value in handle format; this field can be updated, but by default is automatically generated based on the Value Name
- Swatch Color - the HMTL color code used by the Shopify storefront for the value; will be ignored if a Swatch URL is specified
- Swatch URL - the image link used by the Shopify storefront for this value; you can upload a new image file or paste an existing URL
- Click the Save button to save your changes to the value. It may take several minutes for these changes to be visible on your Shopify storefront
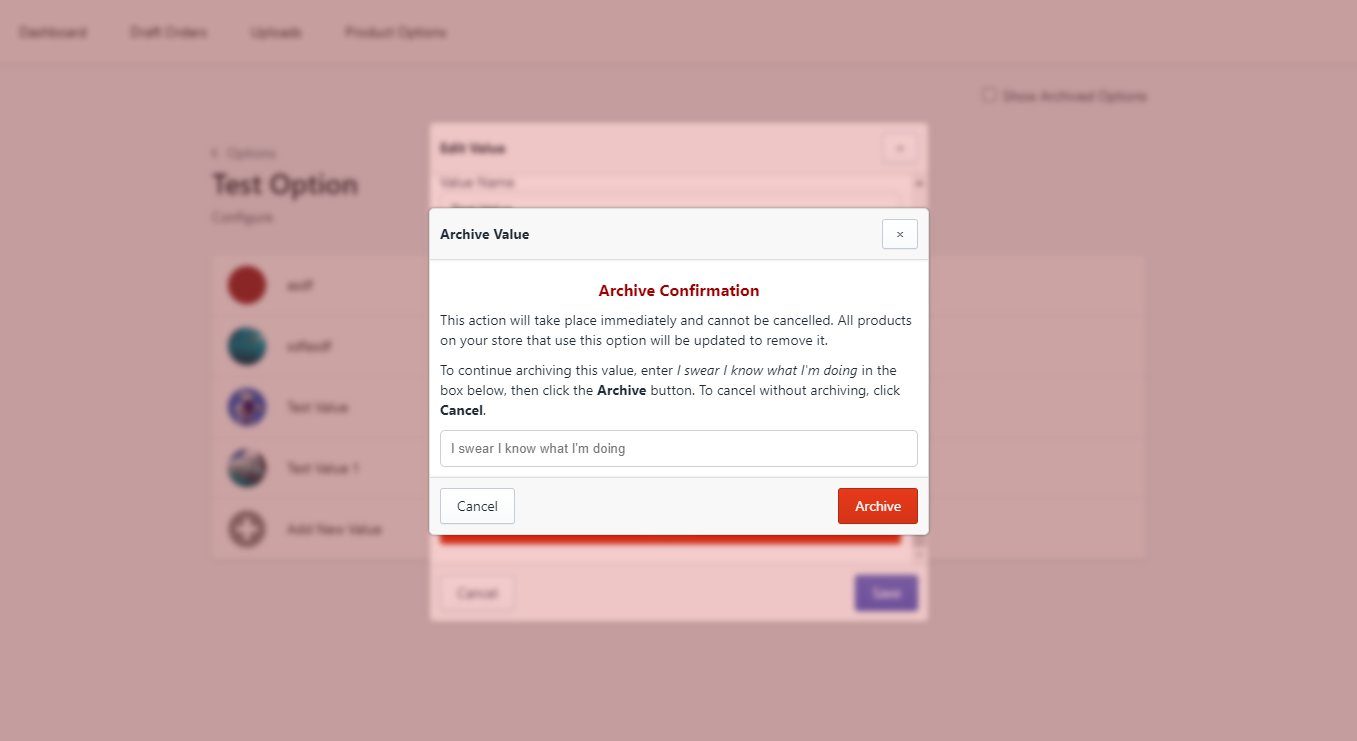
Archiving a Value
- View the parent option if it is not already open
- Click the value you wish to edit in the Values list
- Scroll down within the Edit Value dialog and click the red Archive button
- A dialog box will appear with important information about what will happen when you archive the value. Before you will be able to complete the archive, you will need to enter confirmation text in the provided text field
- Enter the confirmation text
- Click the Archive button. The server will begin to update all products that use this value. Once this has started, it cannot be stopped.