Configuring Mix & Match Bundles
Guide Overview
For the duration of this guide, we will be using two test products and one sample coupon code to showcase how everything is configured. The same process should apply to an actual product. Below are links:
- Test Bundle - Mix and Match -> The product that holds the bundle.
- Mix & Match Individual Products -> The product that will be added to the bundle meta-fields.
- JPTEST -> The coupon code that will be added to the bundle meta-fields.
Getting Started
To start using bundle products, we will need to configure a discount code, a product with variant options, and a product to hold the bundle.
Setting up the Individual Product
Mix & Match Individual Products has the following Scent variants: Cucumber Melon, Moo La La, Berrylicious, Oatmeal Milk & Honey Charcoal, Obsession, Blood Orange, Lavender Chamomile, Vanilla Bean. Each variant needs a price assigned to it and an available quantity associated with it. See the example below:
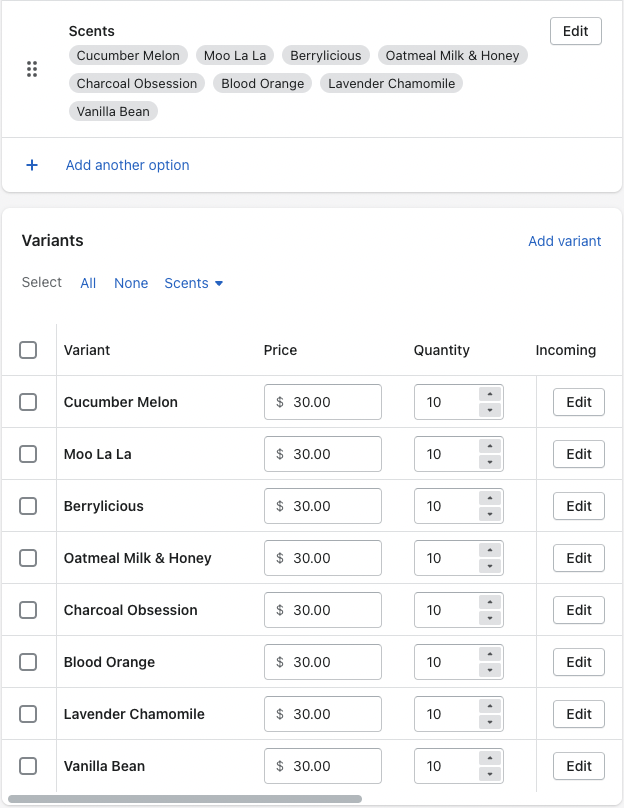
***CAUTION*** Do not add anything to the pdp product bundle meta-fields or the bundle discount code meta-field. These are not needed on the individual product.
-c2491cf999b04dd4d5a86571972e4ec2.png)
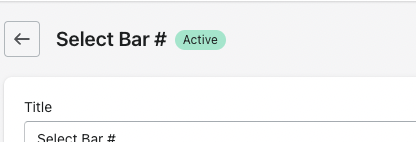
If you would like your product to have a number associated with it, please include a '#' in the title where you want the number to appear.
Setting up the Discount Code
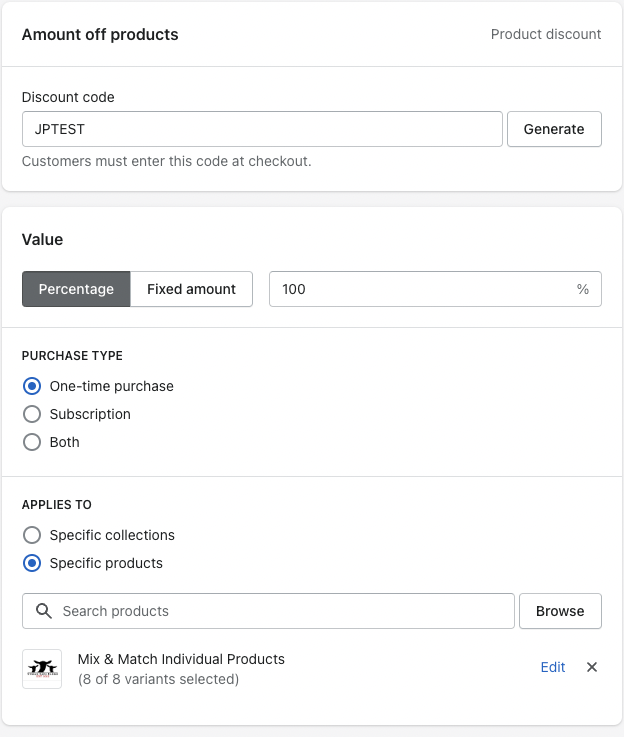
Before adding the new product bundle, we need to configure the product discount code. To do this, create a new discount code. For this example, we are applying this coupon code to all the individual products. The main bundle product will hold the correct price for the entire bundle so the price of the individual items will need to be accounted for. To do this, we set the discount percentage to 100%. To make sure that this coupon code only works for our new variant product, we add the Mix & Match Individual Product variants to the APPLIES TO field. See example below:
Setting up the Bundle Product
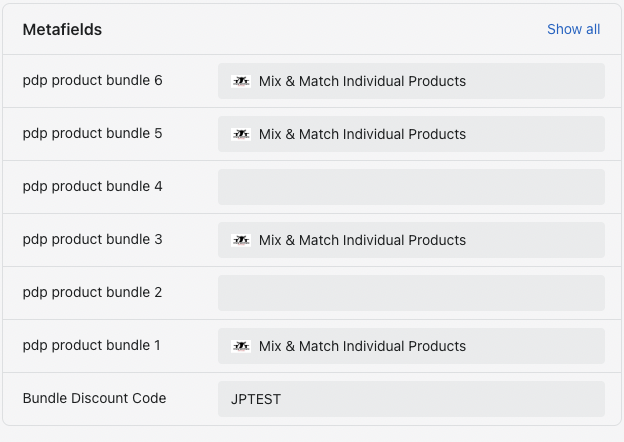
Finally, we need to configure the product that holds all the components of the bundle. Test Bundle - Mix and Match will be the product that represents our new bundle. To add a bundle option, click on one of the 6 meta-fields labeled pdp product bundle X. From the selection modal, find, the product that you created for the bundle. For our example, we are looking for Mix & Match Individual Products. After making a selection, click save to apply the changes.
***Note*** we can add products out of order. If we add a product to meta-field 2 and meta-field 6, while leaving everything else blank, the bundle will still work.
To finish setting up our bundle product, we need to add a coupon code to the Bundle Discount Code field. This is what allows the prices to get corrected to the bundle price at checkout. In our case, we add the JPTEST code. When all is said and done, the meta-fields should look something like this:
Testing the bundle
Testing the Product Page
To start testing the bundle, make sure to publish the coupon code, the bundle product and the individual product. Once all of the listed items are published, navigate to the bundle product on the page. In our example, we had 4 bundle items and 1 coupon code so we need to verify that each piece is present and accounted for.
When we land on the product page, we are checking for a few things:
- Does the product have the correct amount of dropdown options?
- Can the bundle be added to the cart?
First, we need to check that each product has the correct amount of options. If a product variant is out of stock, the variant option should be disabled automatically. Additionally, if the product only has one variant option, it will default that as the selected item in the dropdown.
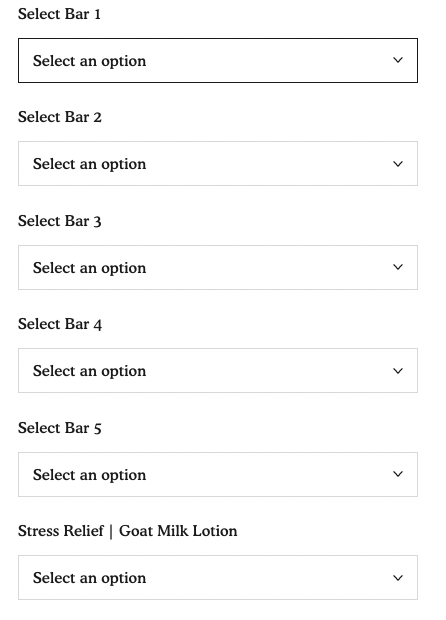
Next, we go through and select an option for each option set. Once all options have been selected, the add to cart button should now be clickable.
Finally, we add the item to the cart. At this point, we should be redirected to the shopping cart page.
Did the bundle pass all the checks? If it didn't pass a check, make sure you have configured all of the necessary components for the bundle.
Testing the Checkout Page
With the bundle added to the cart, we can now test to see if the coupon code is automatically applied at checkout. To do this, click the checkout button on the cart page.
-9dc1995088f71633c123340a16d6a8a8.png)
Once at checkout, we need to make sure that the coupon code we added to the meta-field has been correctly attached to the cart.
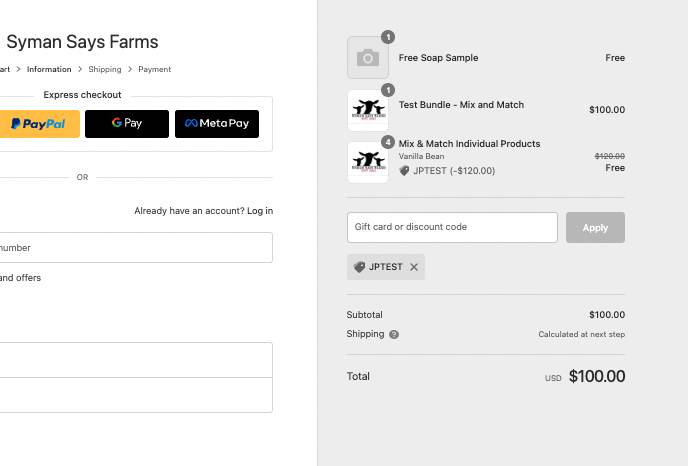
As we can see, the coupon code attached properly and is discounting the bundle items to $0.00 and keeps the bundle parent at full price. Not seeing a coupon code? Is the discount incorrect? Make sure that the discount code in the metafield matches your new discount code exactly. Additionally, check your discount rate to make sure it is properly set up.
Testing the Checkout Page
To finish off testing, we can test to see if the bundle gets removed from the cart. To do this, navigate to the cart page and find either a component of the bundle or the parent item's remove button. See example below:
-9dc1995088f71633c123340a16d6a8a8.png)
Upon clicking the remove button, the item should be removed from the cart. If for some reason the bundle will not remove at all and you need to clear the cart, click this link. This will remove all items from the cart.