🤖 Publish on Android
Preparing Google Play Console
- Sign into The U's Email Account ( Login credentials can be found in PassPortal )
info
This email account requires 2FA to complete the login process. This can only be completed by the company's owner. Please reach out to Justin for assistance getting into the email account.
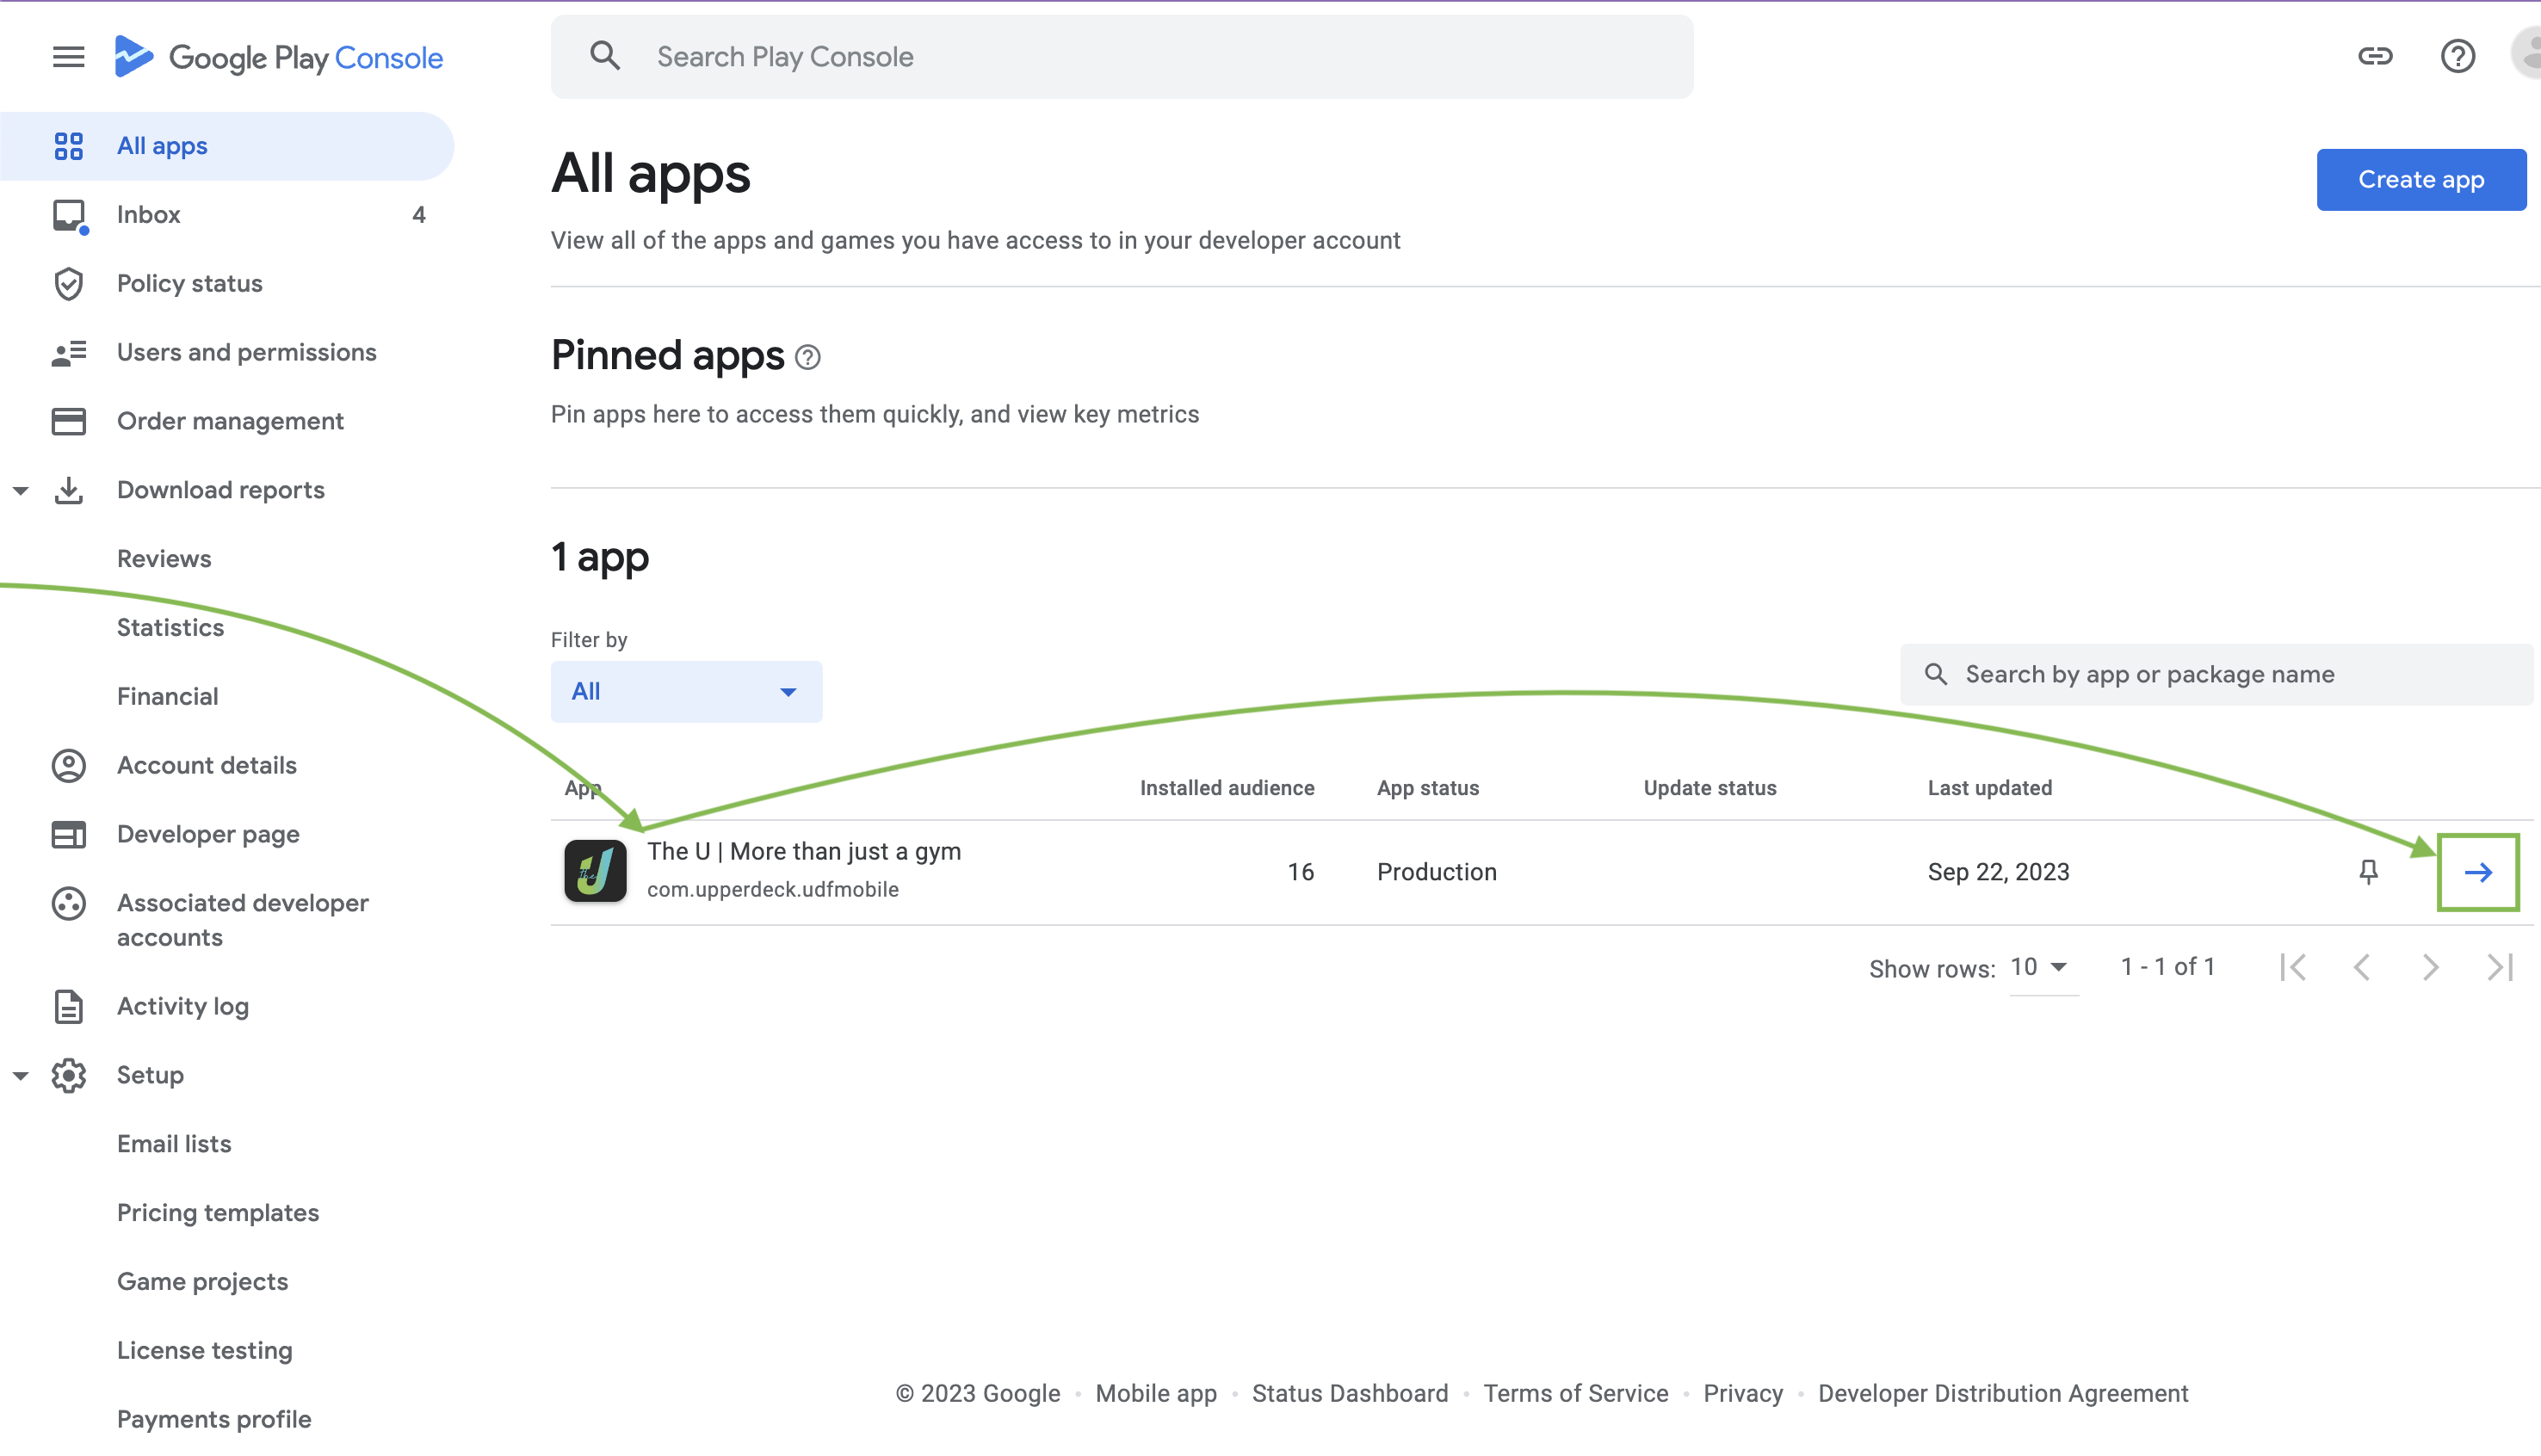
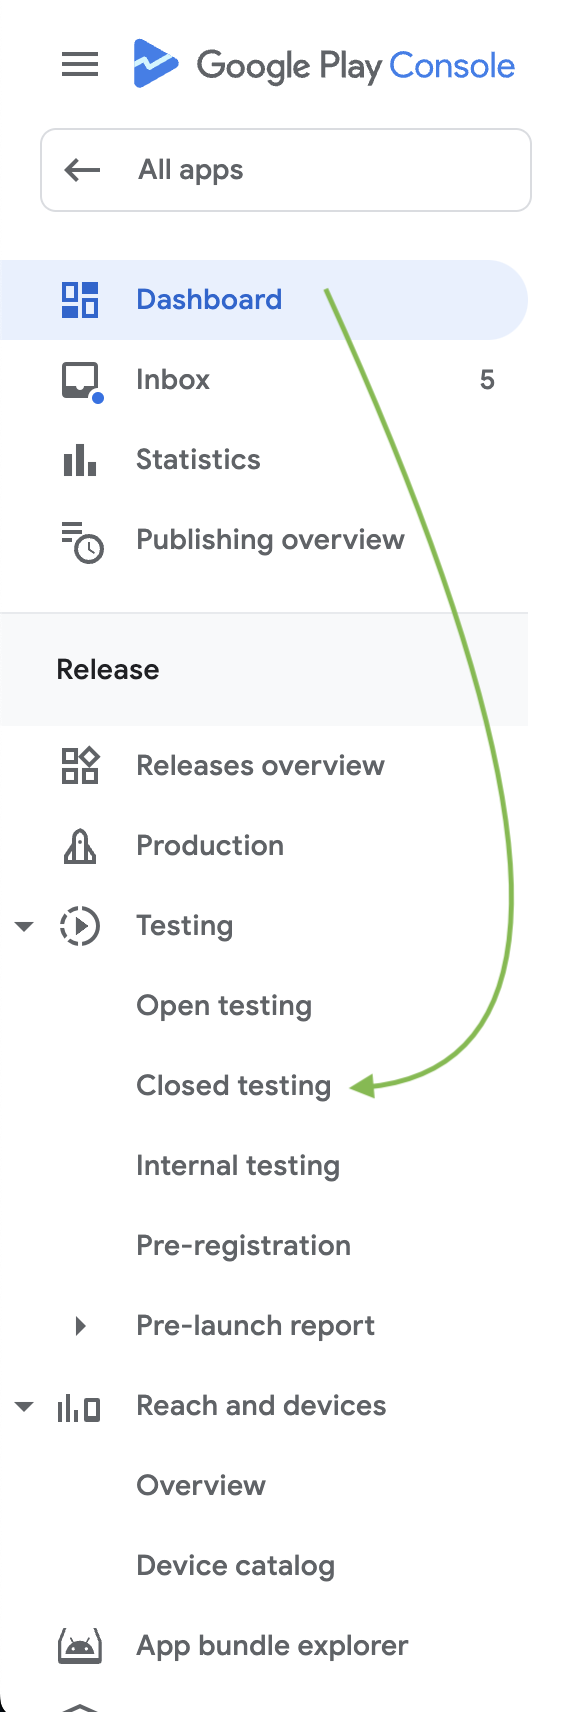
Once signed in, open up the Google Play Console. On the dashboard, Select "All Apps" and open the app called "The U | More than just a gym"
We will leave this tab open for now and return to it later.
Configuring Android Studio
In order to deploy the app to the Google Play Store, we first need to do some project configuration in Android studio.
Opening The App
- Download and Install Android Studio
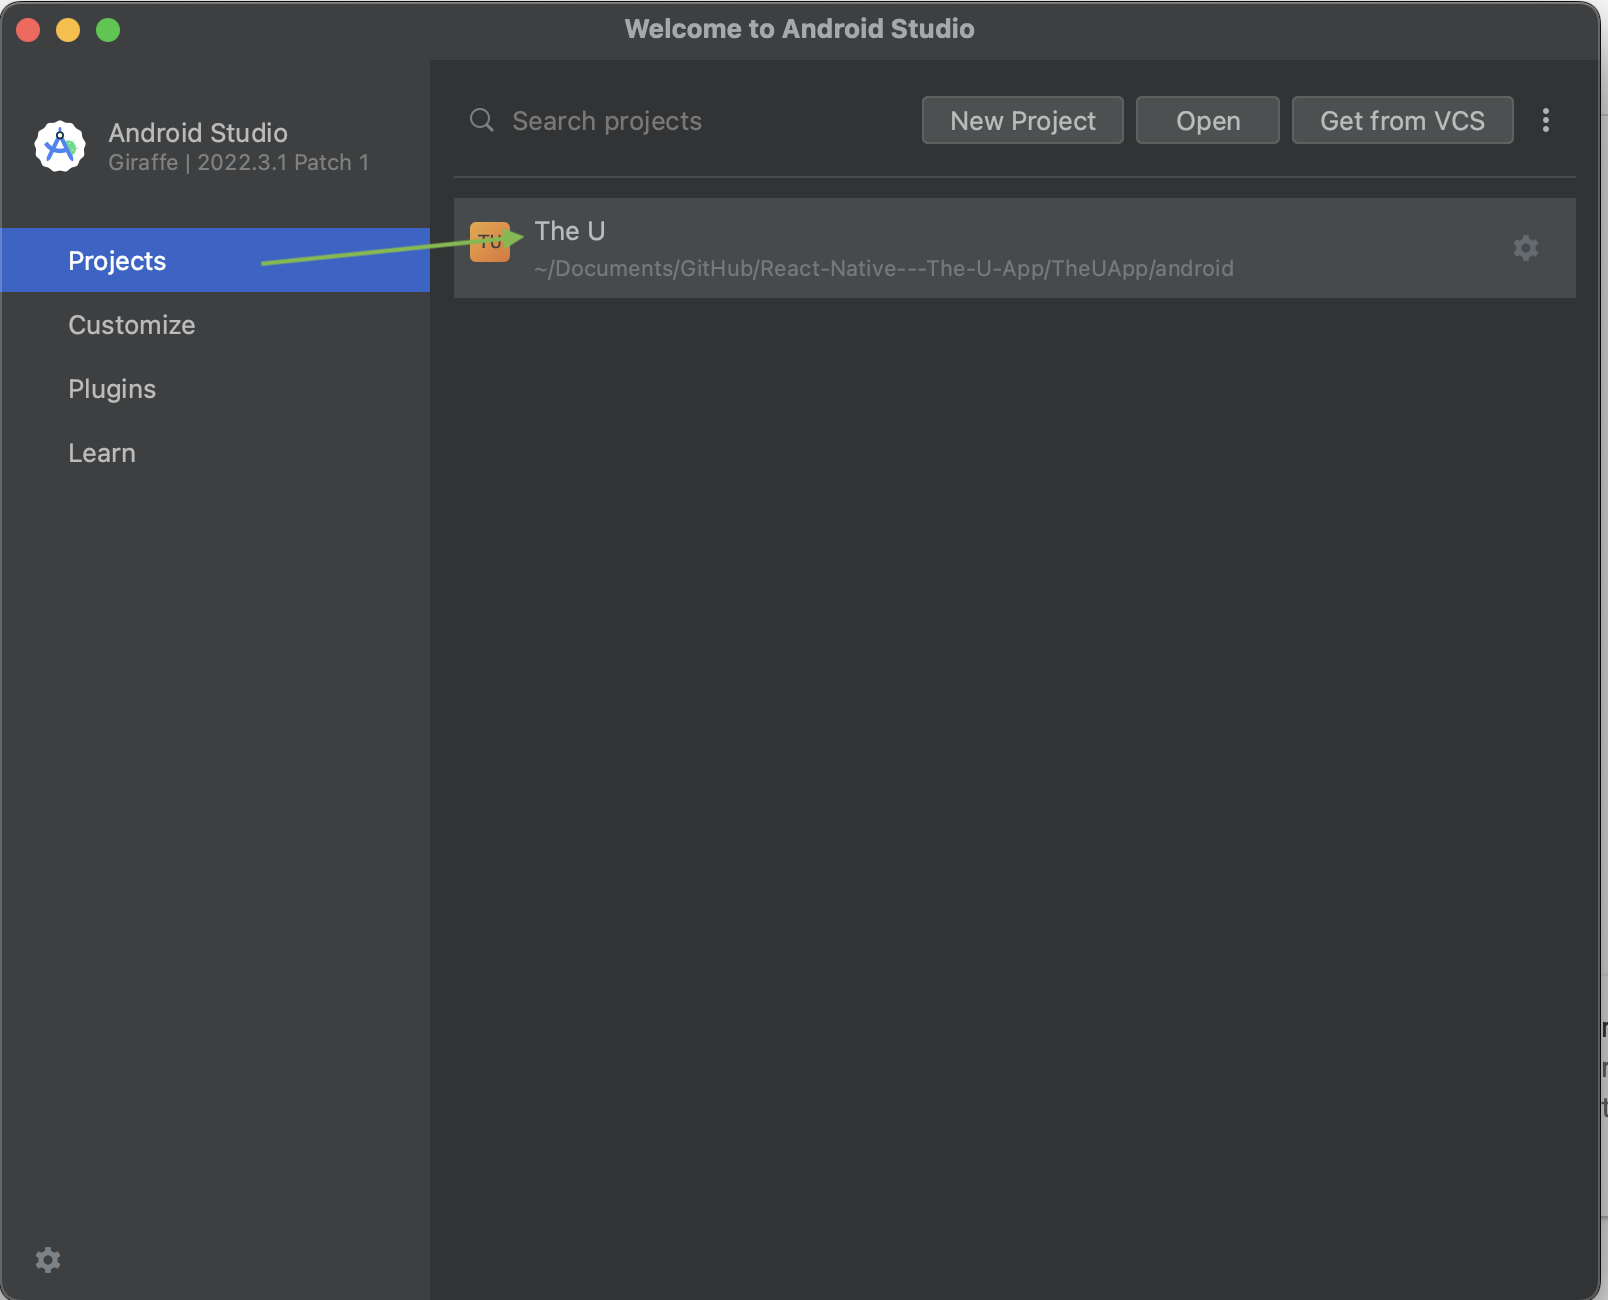
- Open Android Studio
- If you already have Android Studio Installed and have opened the project before, click on the project "The U" and continue to the next section.
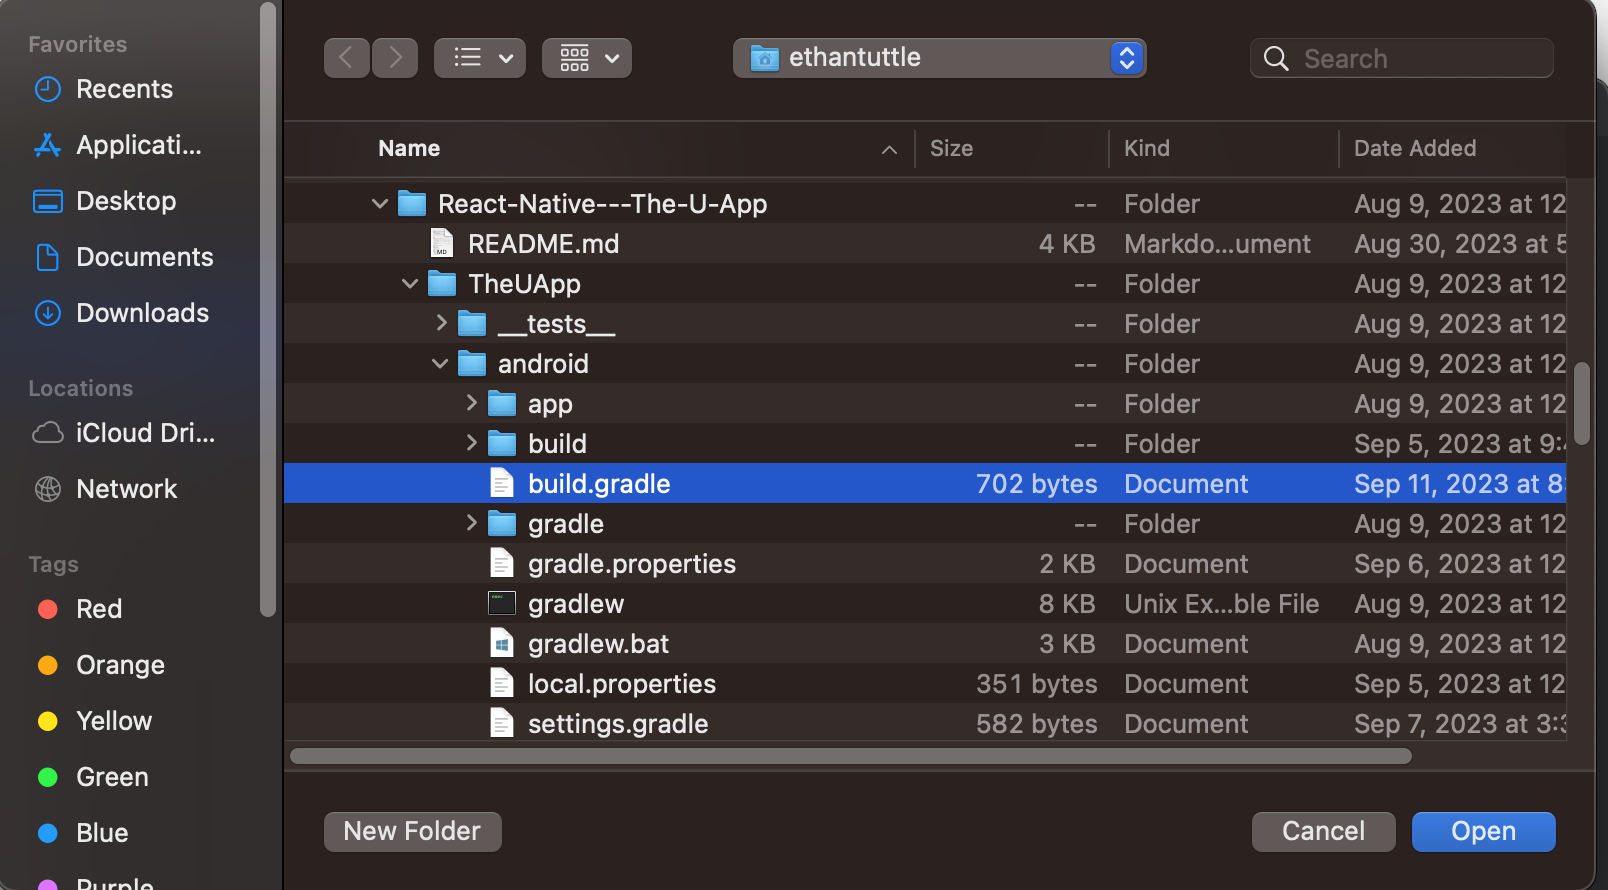
- If you have NOT opened the project before, under the Projects Tab, Click Open and navigate to the android folder for the React Native project.
-933333a033aabaddc80a148c1b9195bd.png)
- Select the build.gradle file inside this folder
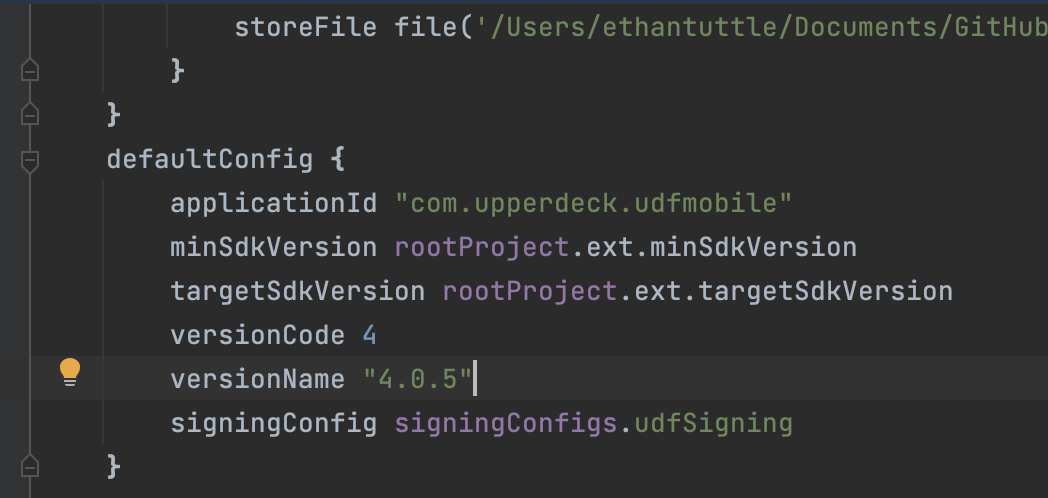
- Update the build.gradle versionCode by adding 1 to whatever value is currently present.
- if the value is 4, change to 5.
- if the value is 1000, change to 1001.
- Update the build.gradle versionName to the latest version of the app.
warning
Error: "Version code X has already been used. Try another version code."
If the version number is already taken when you try to upload, itterate the version code by one additional value. For example, if you updated the version to 5 and version 5 was already used, change it to 6. Continue this process until that upload is successful.
Update the Release Build
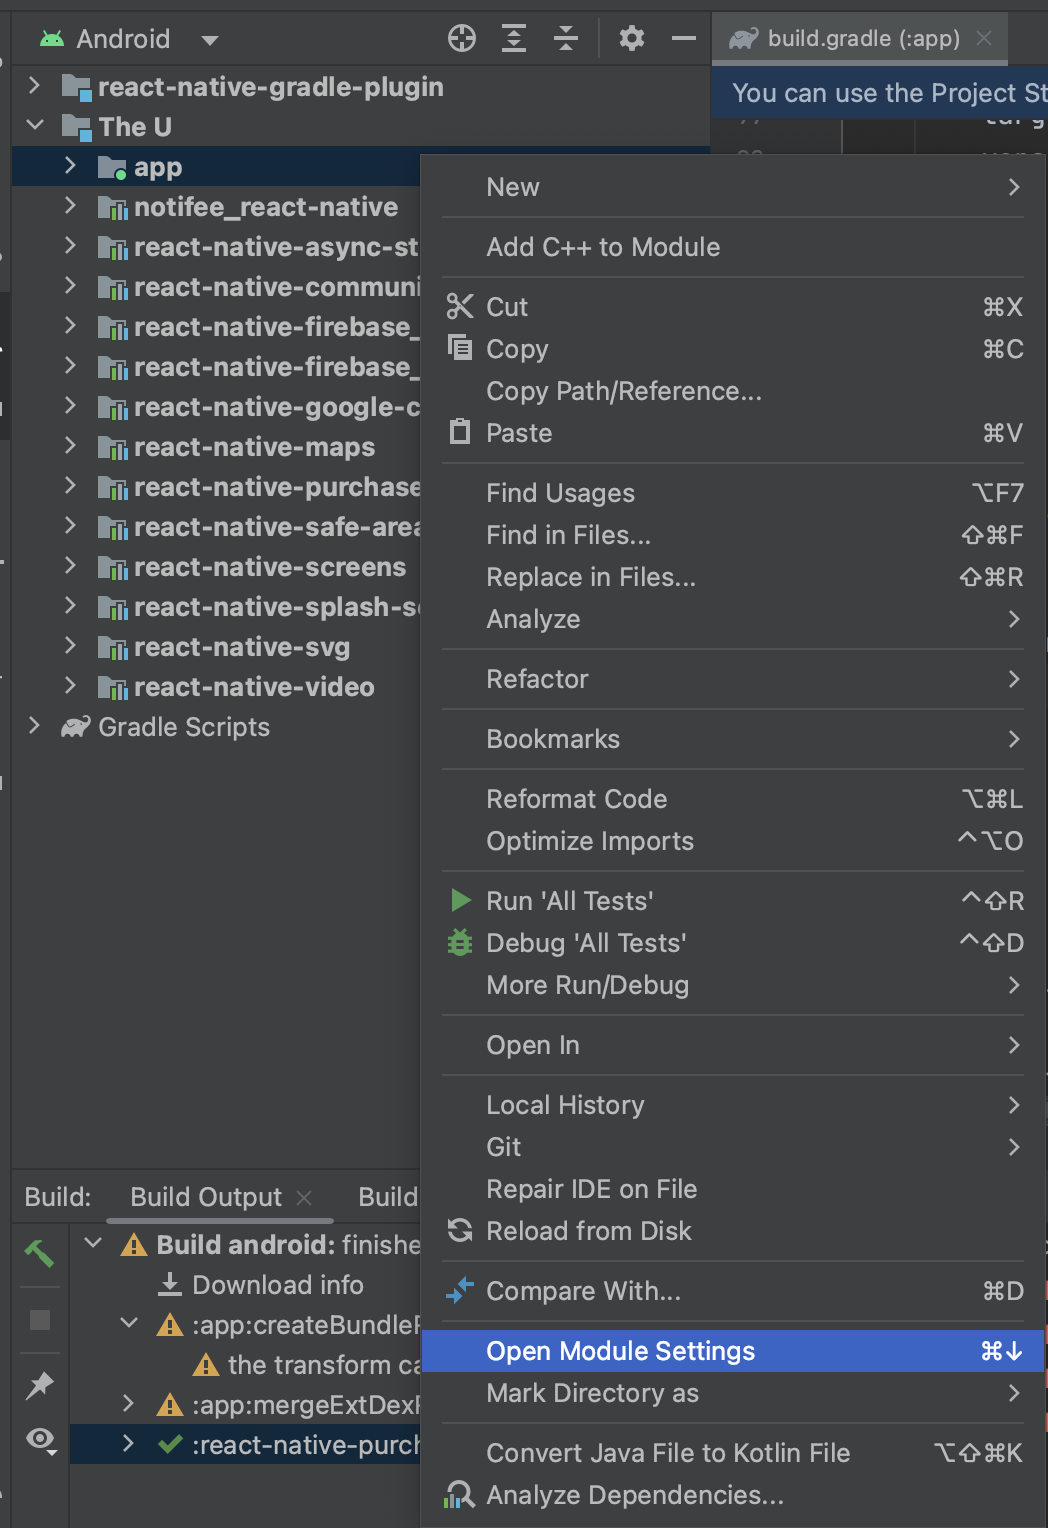
- Inside Android Studio, Right Click on the folder called "app" in the project explorer
- Select "Open Module Settings"
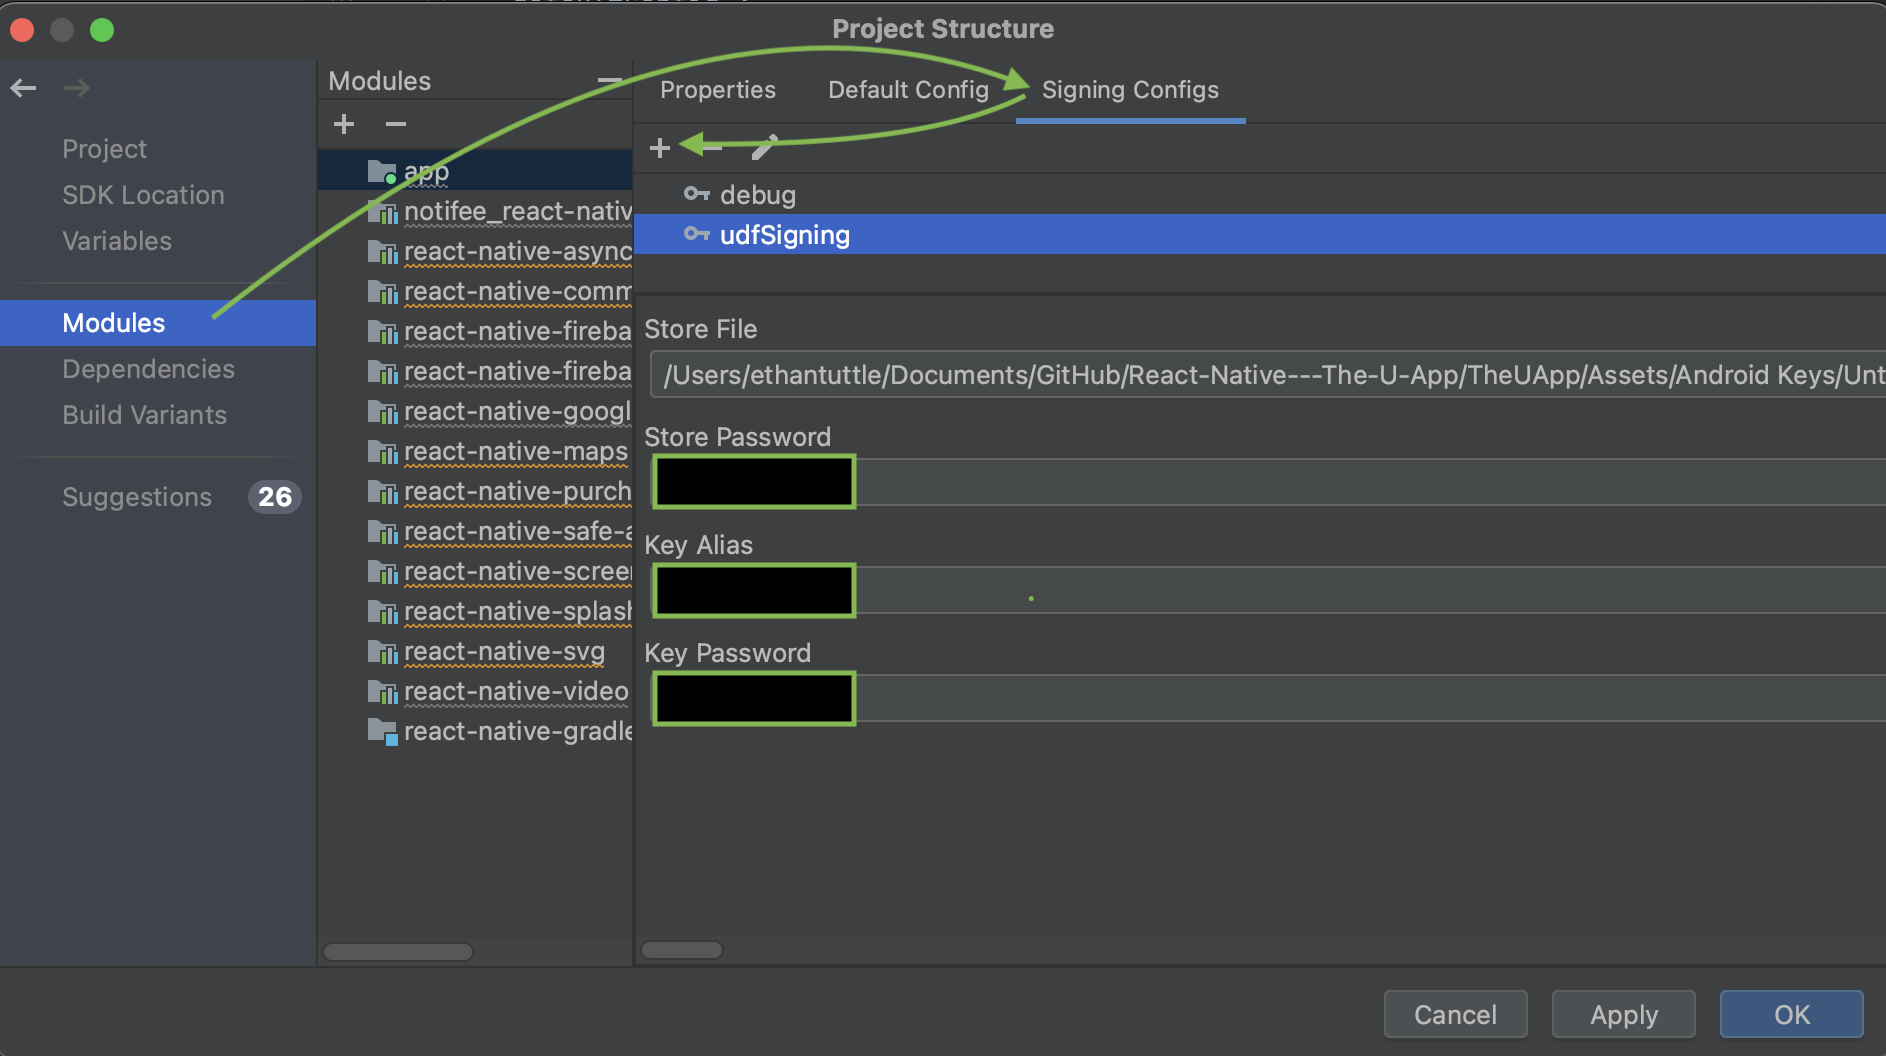
- Select Modules -> Signing Config
- Click the + icon to add a new signing config.
- Name it udfSigning
- Click on the folder icon at the end of the input field for "Store File"
- Navigate to the following directory: React-Native---The-U-App -> TheUApp -> Assets -> Android Keys
- Select the file named "Untitled"
- Inside the directory for Android Keys, open the readme.md file
- Set the Store Password to the value of "Key store password" in the readme.md file
- Set the Key Alias to the value of "Key alias" in the readme.md file
- Set the Key Password to the value of "Key password" in the readme.md file
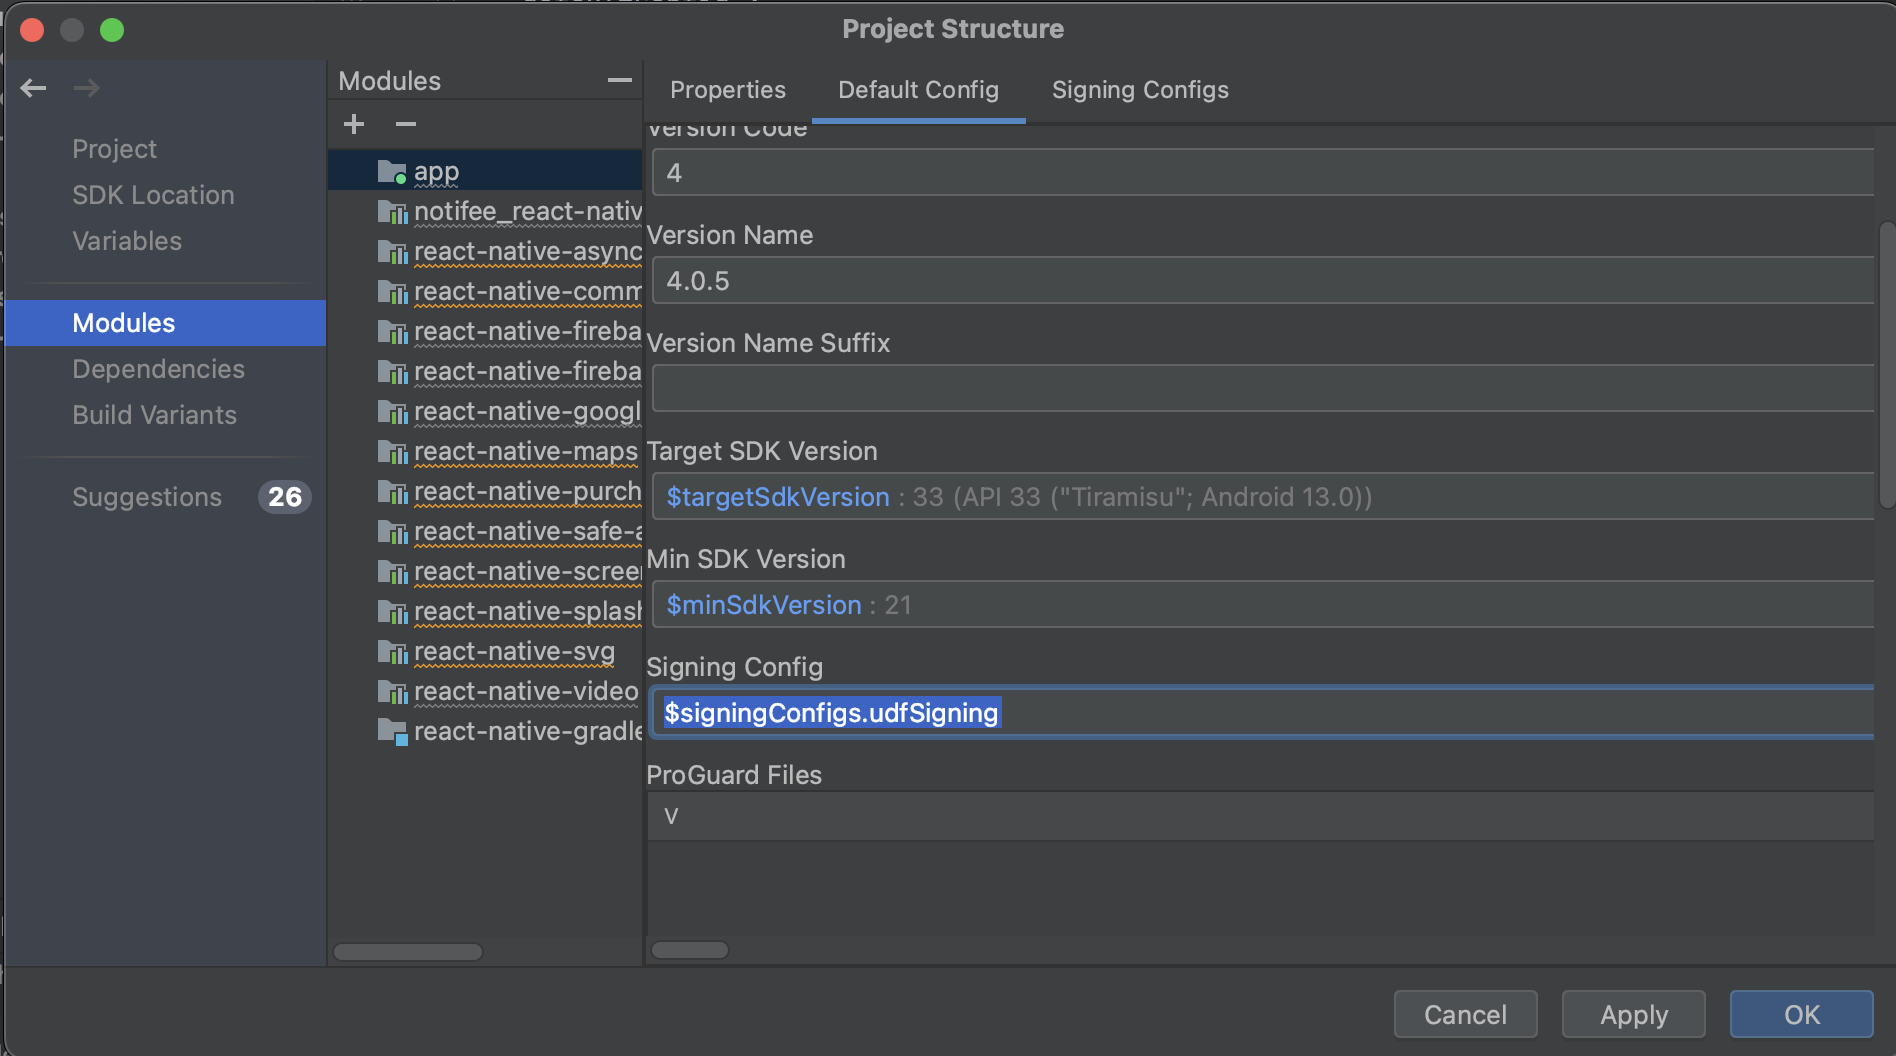
- Select Modules -> Default Config
- Set the new version name
- Set the signing config to the new signing config we just created
- $signingConfigs.udfSigning
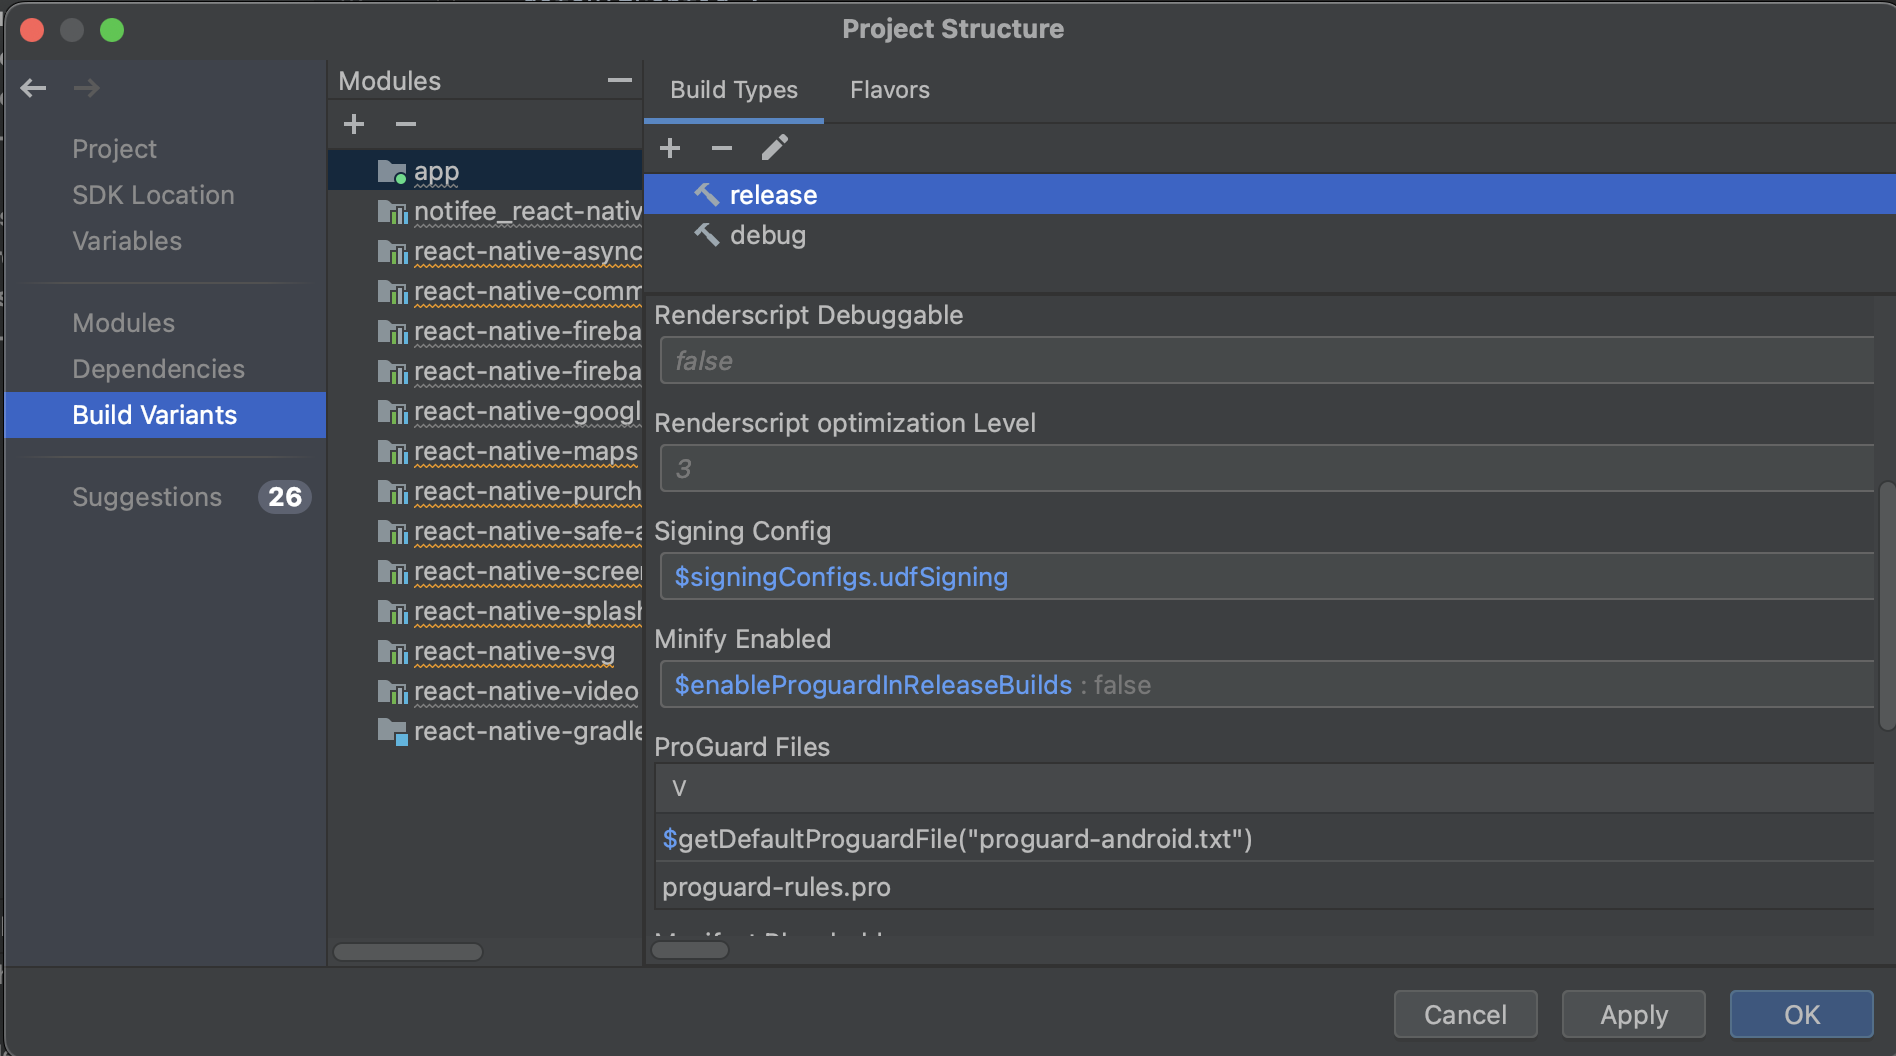
- Select Build Variants -> release
- Set signing Config to the new signing config we just created
- $signingConfigs.udfSigning
- Set signing Config to the new signing config we just created
Info
If you cannot see the folder selection icon, there is a slider at the bottom of the window that you can use to scroll the window over to the right.
Generating a Signed Bundle
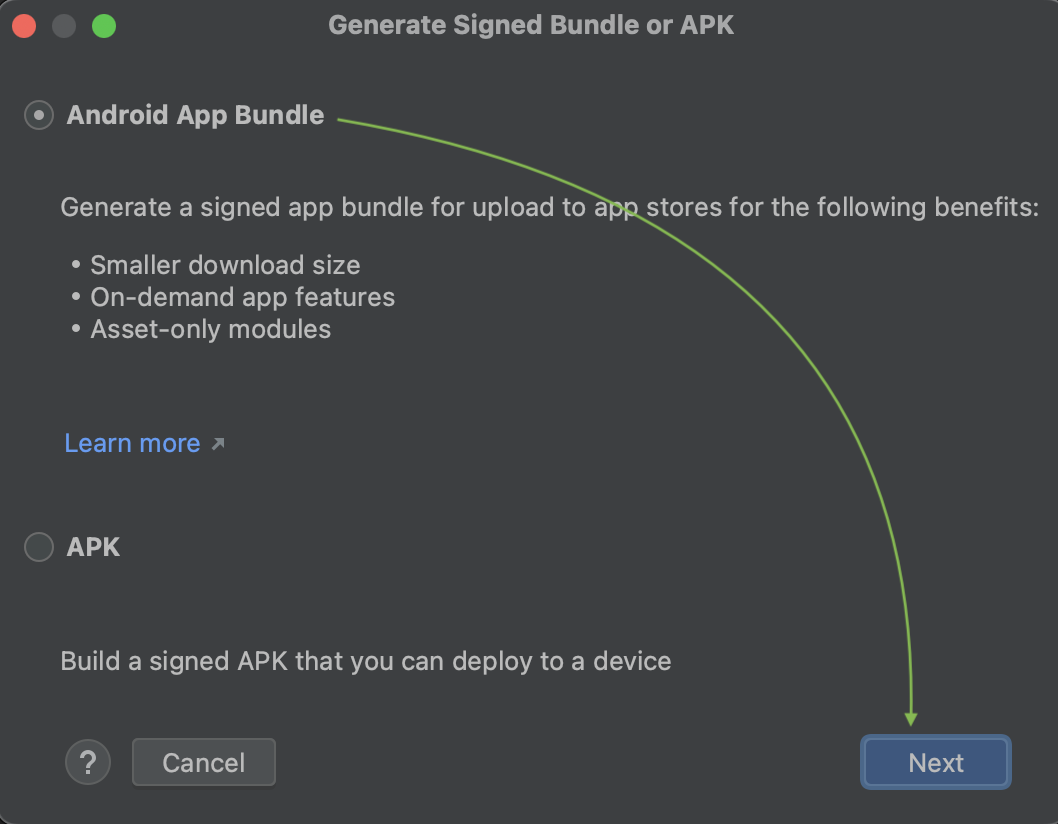
- Select Build -> Generate Signed Bundle / APK

- Inside the Modal window, select Android App Bundle and click next
- Select a key store path
- Click Choose existing...
- Under the React-Native---The-U-App Project folder, navigate to the following directory:
- React-Native---The-U-App -> TheUApp -> Assets -> Android Keys
- Select the file named "Untitled"
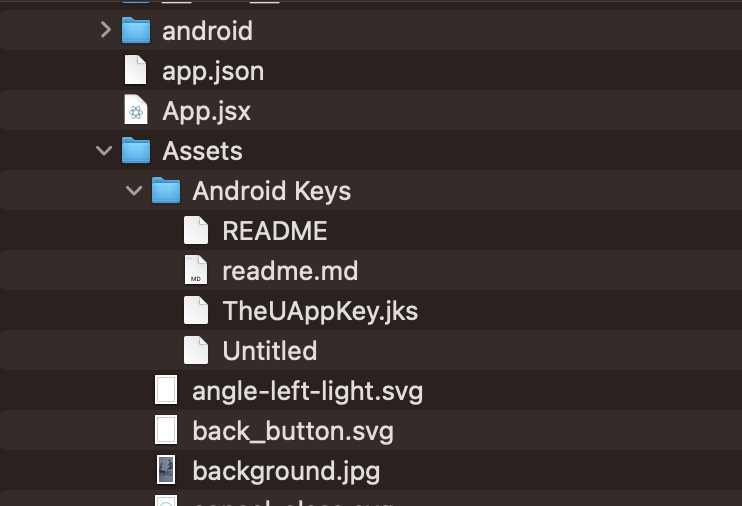
- Inside the directory for Android Keys, open the readme.md file
- Set the key store password to the password in the readme.md file.
- Set the key alias to the alias listed in the readme.md file.
- Set the key password to the password in the readme.md file
- Check the "Remember passwords" checkbox
- Click Next
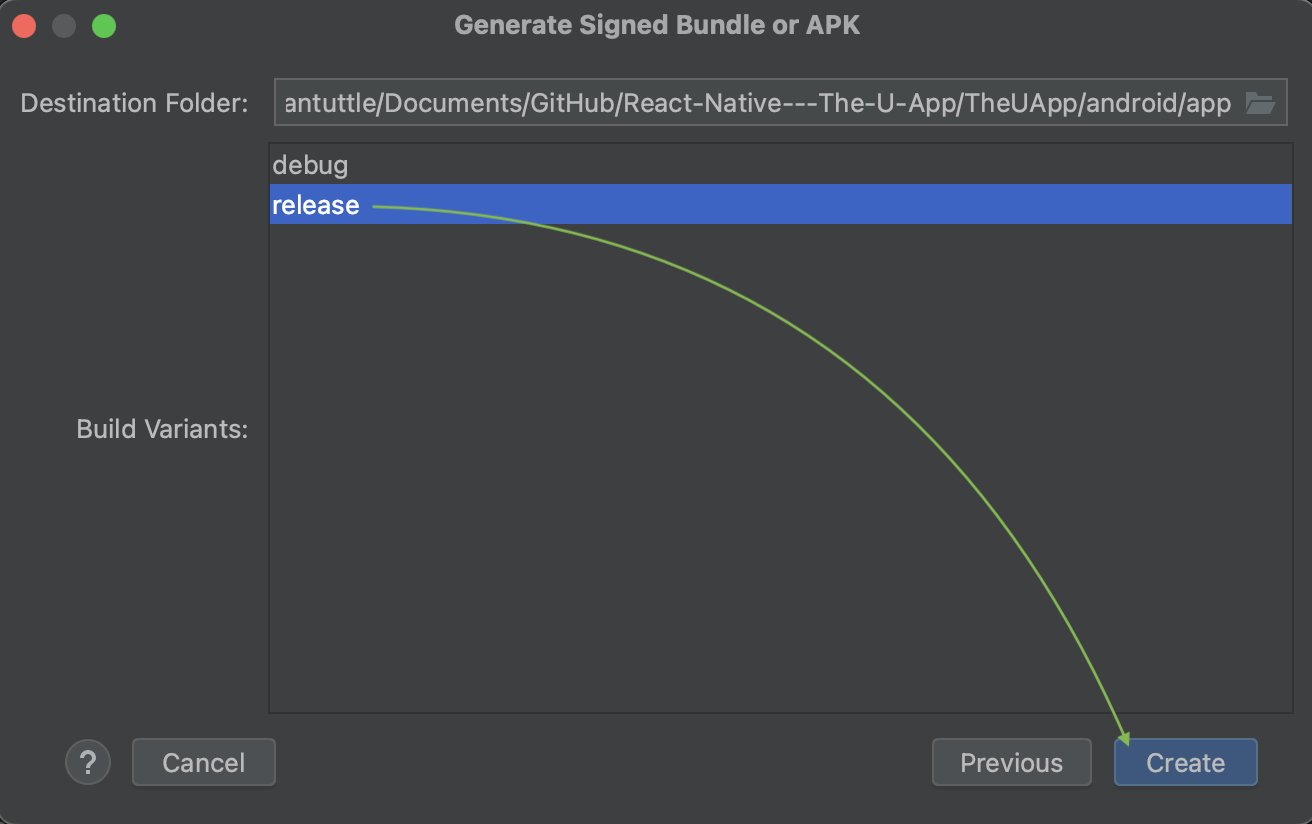
- Select the release build and Click create
Locating the Bundle File
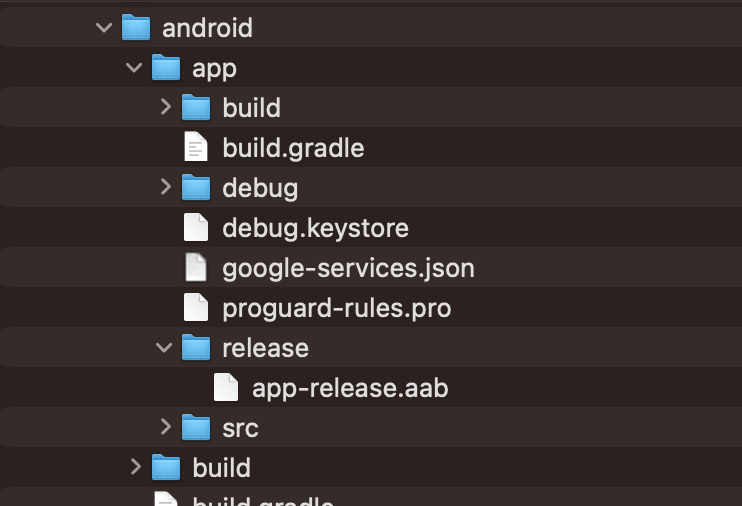
Under the React-Native---The-U-App Project folder, navigate to the following directory
- React-Native---The-U-App -> TheUApp -> android -> app -> release
Inside this folder, you should see a file called app-release.aab. This is the file we are going to need for the Google Play Console.
warning
Make sure to commit the latest build to GitHub as well. ( this file should appear as modified )
Upload the Bundle to Google Play Console
- Open up the Google Play Console that we minimized in an earlier step.
- Navigate to Testing -> Closed Testing
- Select "Manage track" for the "Closed testing - Alpha" track

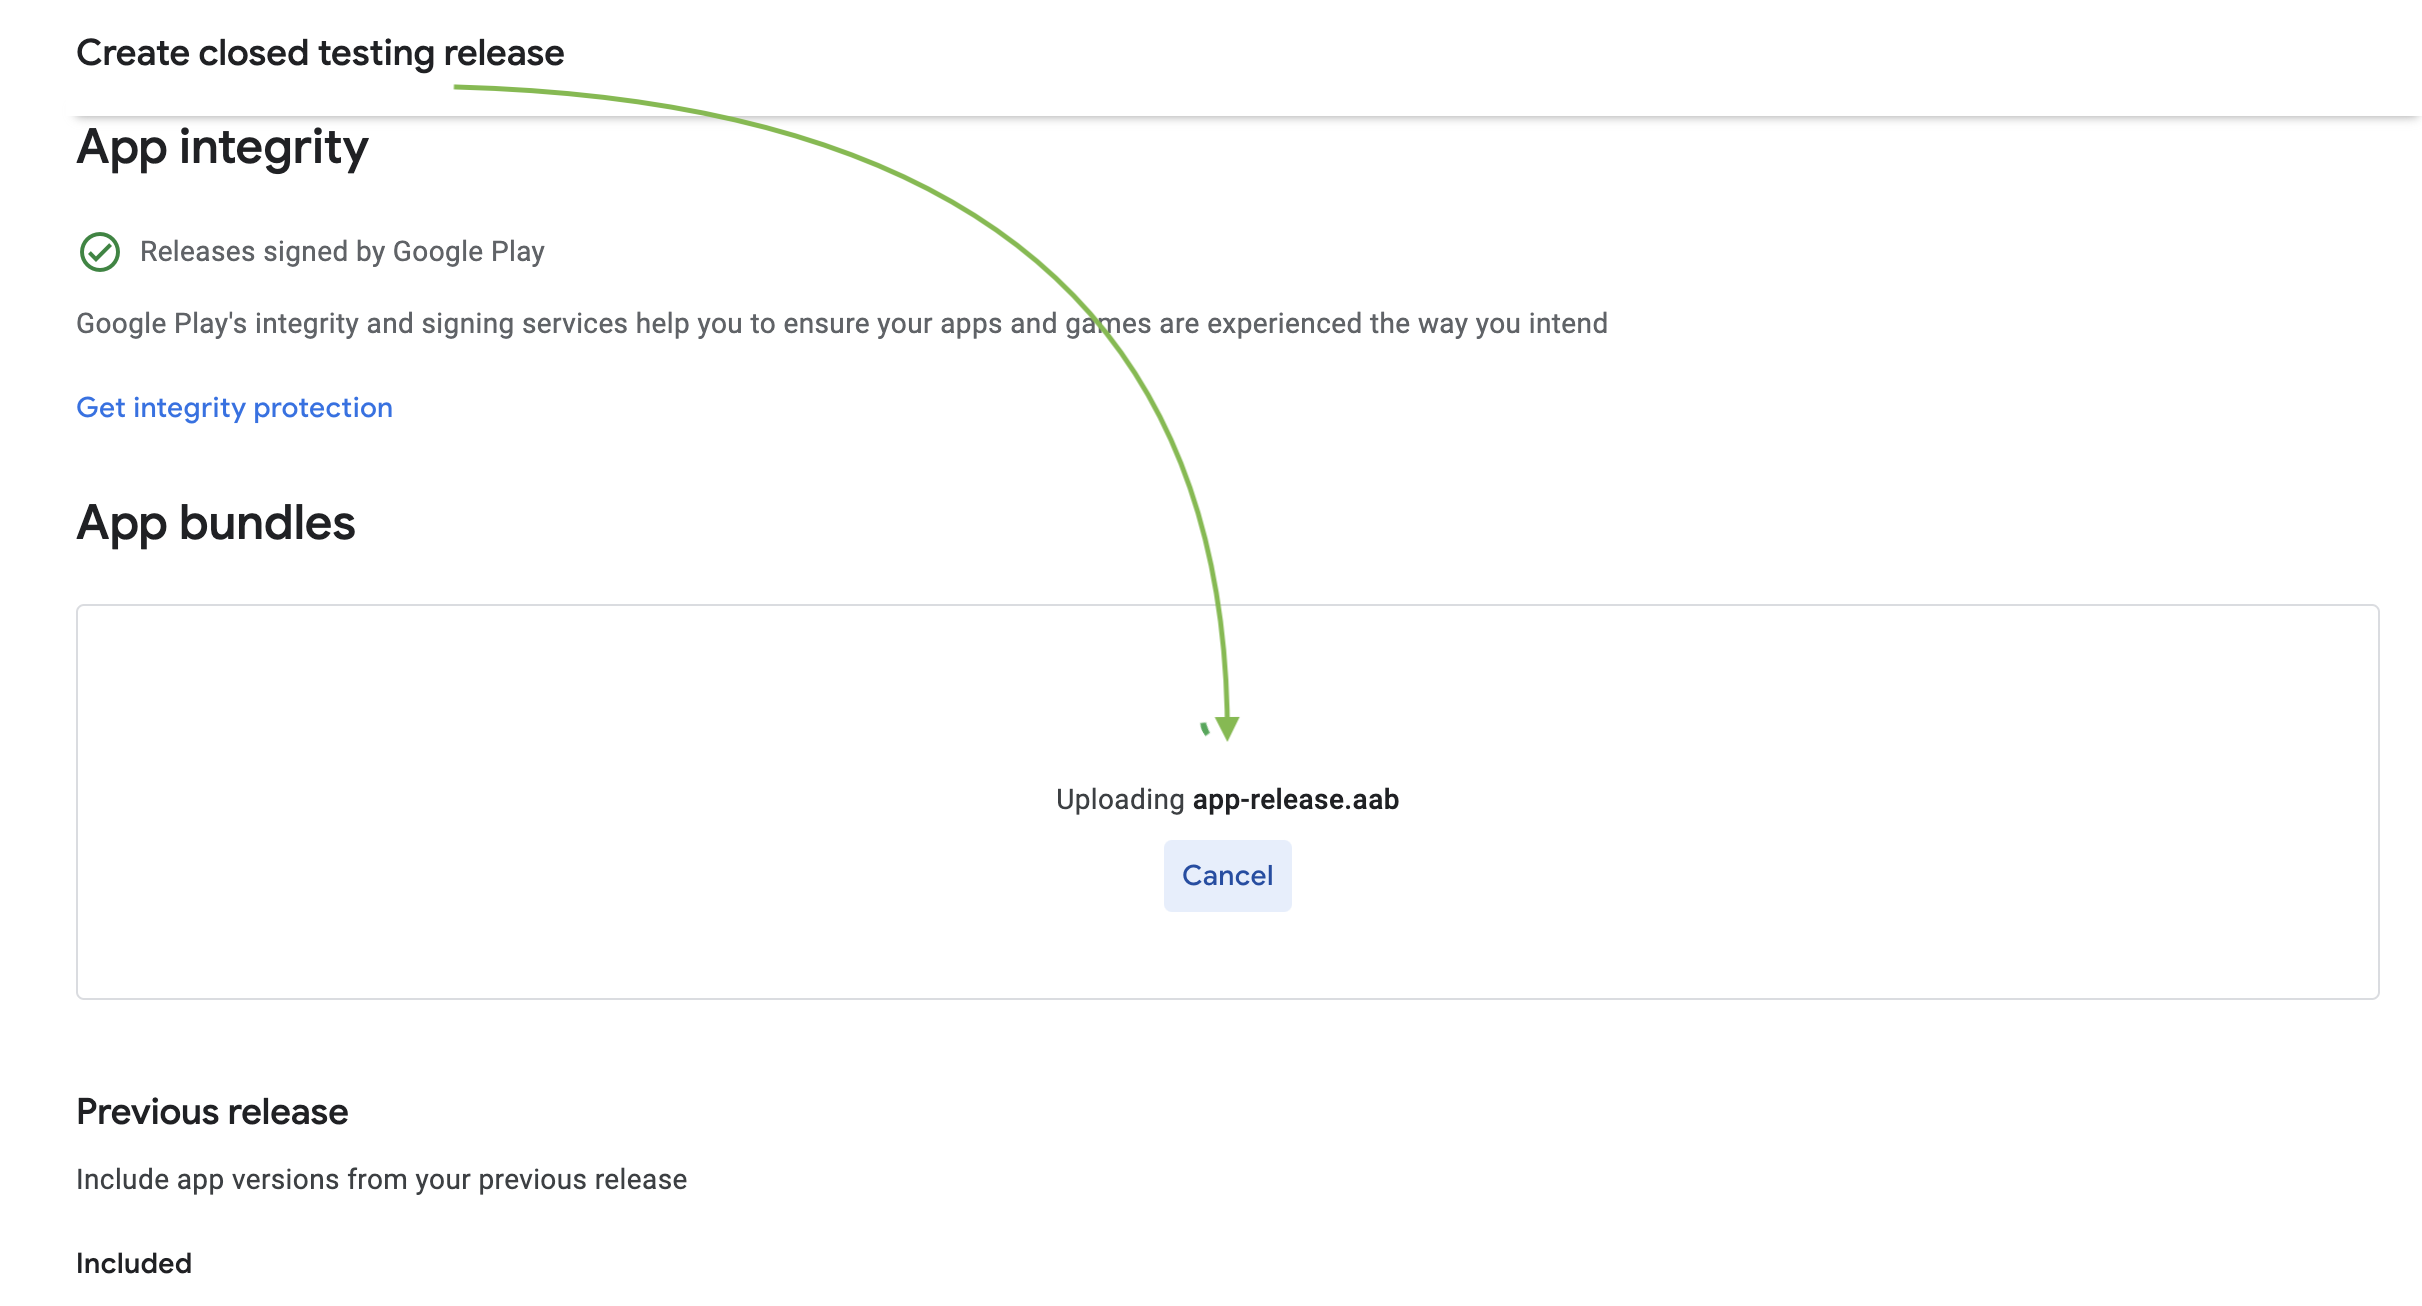
- Click Create new release

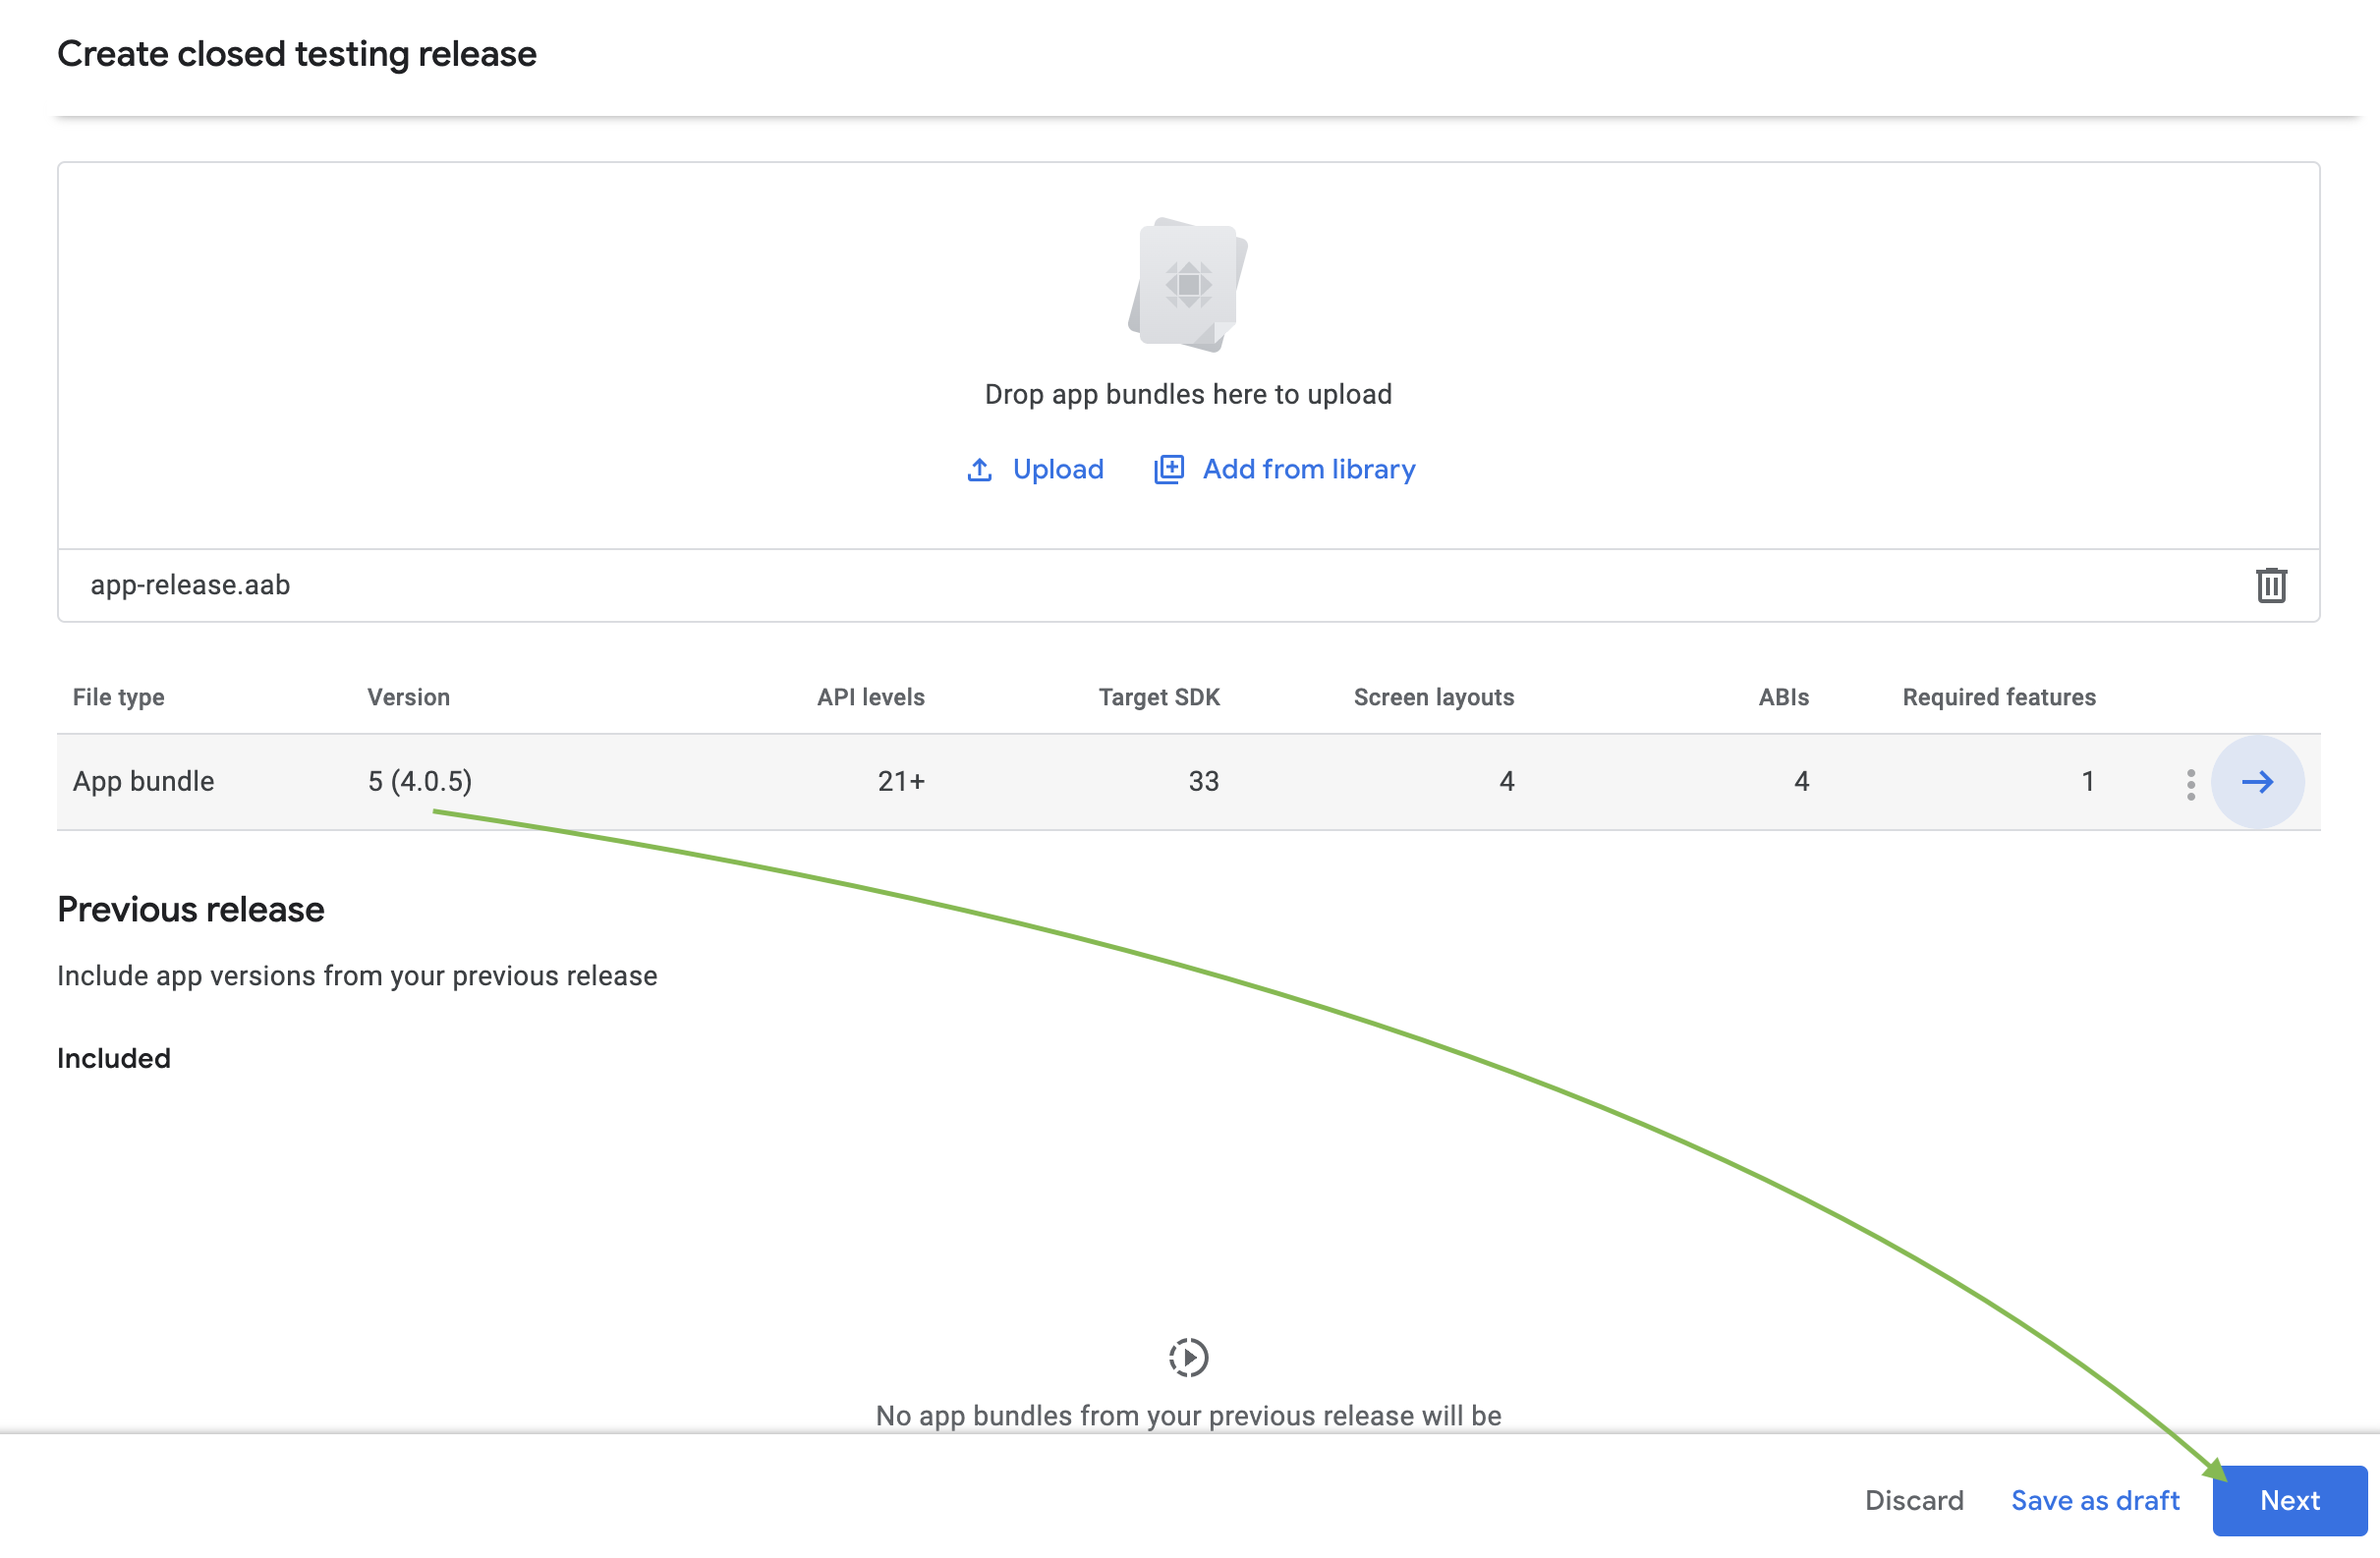
- Upload the app-release.aab to the App bundles
- If the upload fails, visit the Opening The App section.
- Add release Notes
- Release Name should be filled out automatically
- Add your patch notes between the <en-US></en-US> markup tags
- Submit Draft
- Prepare draft for Google Review
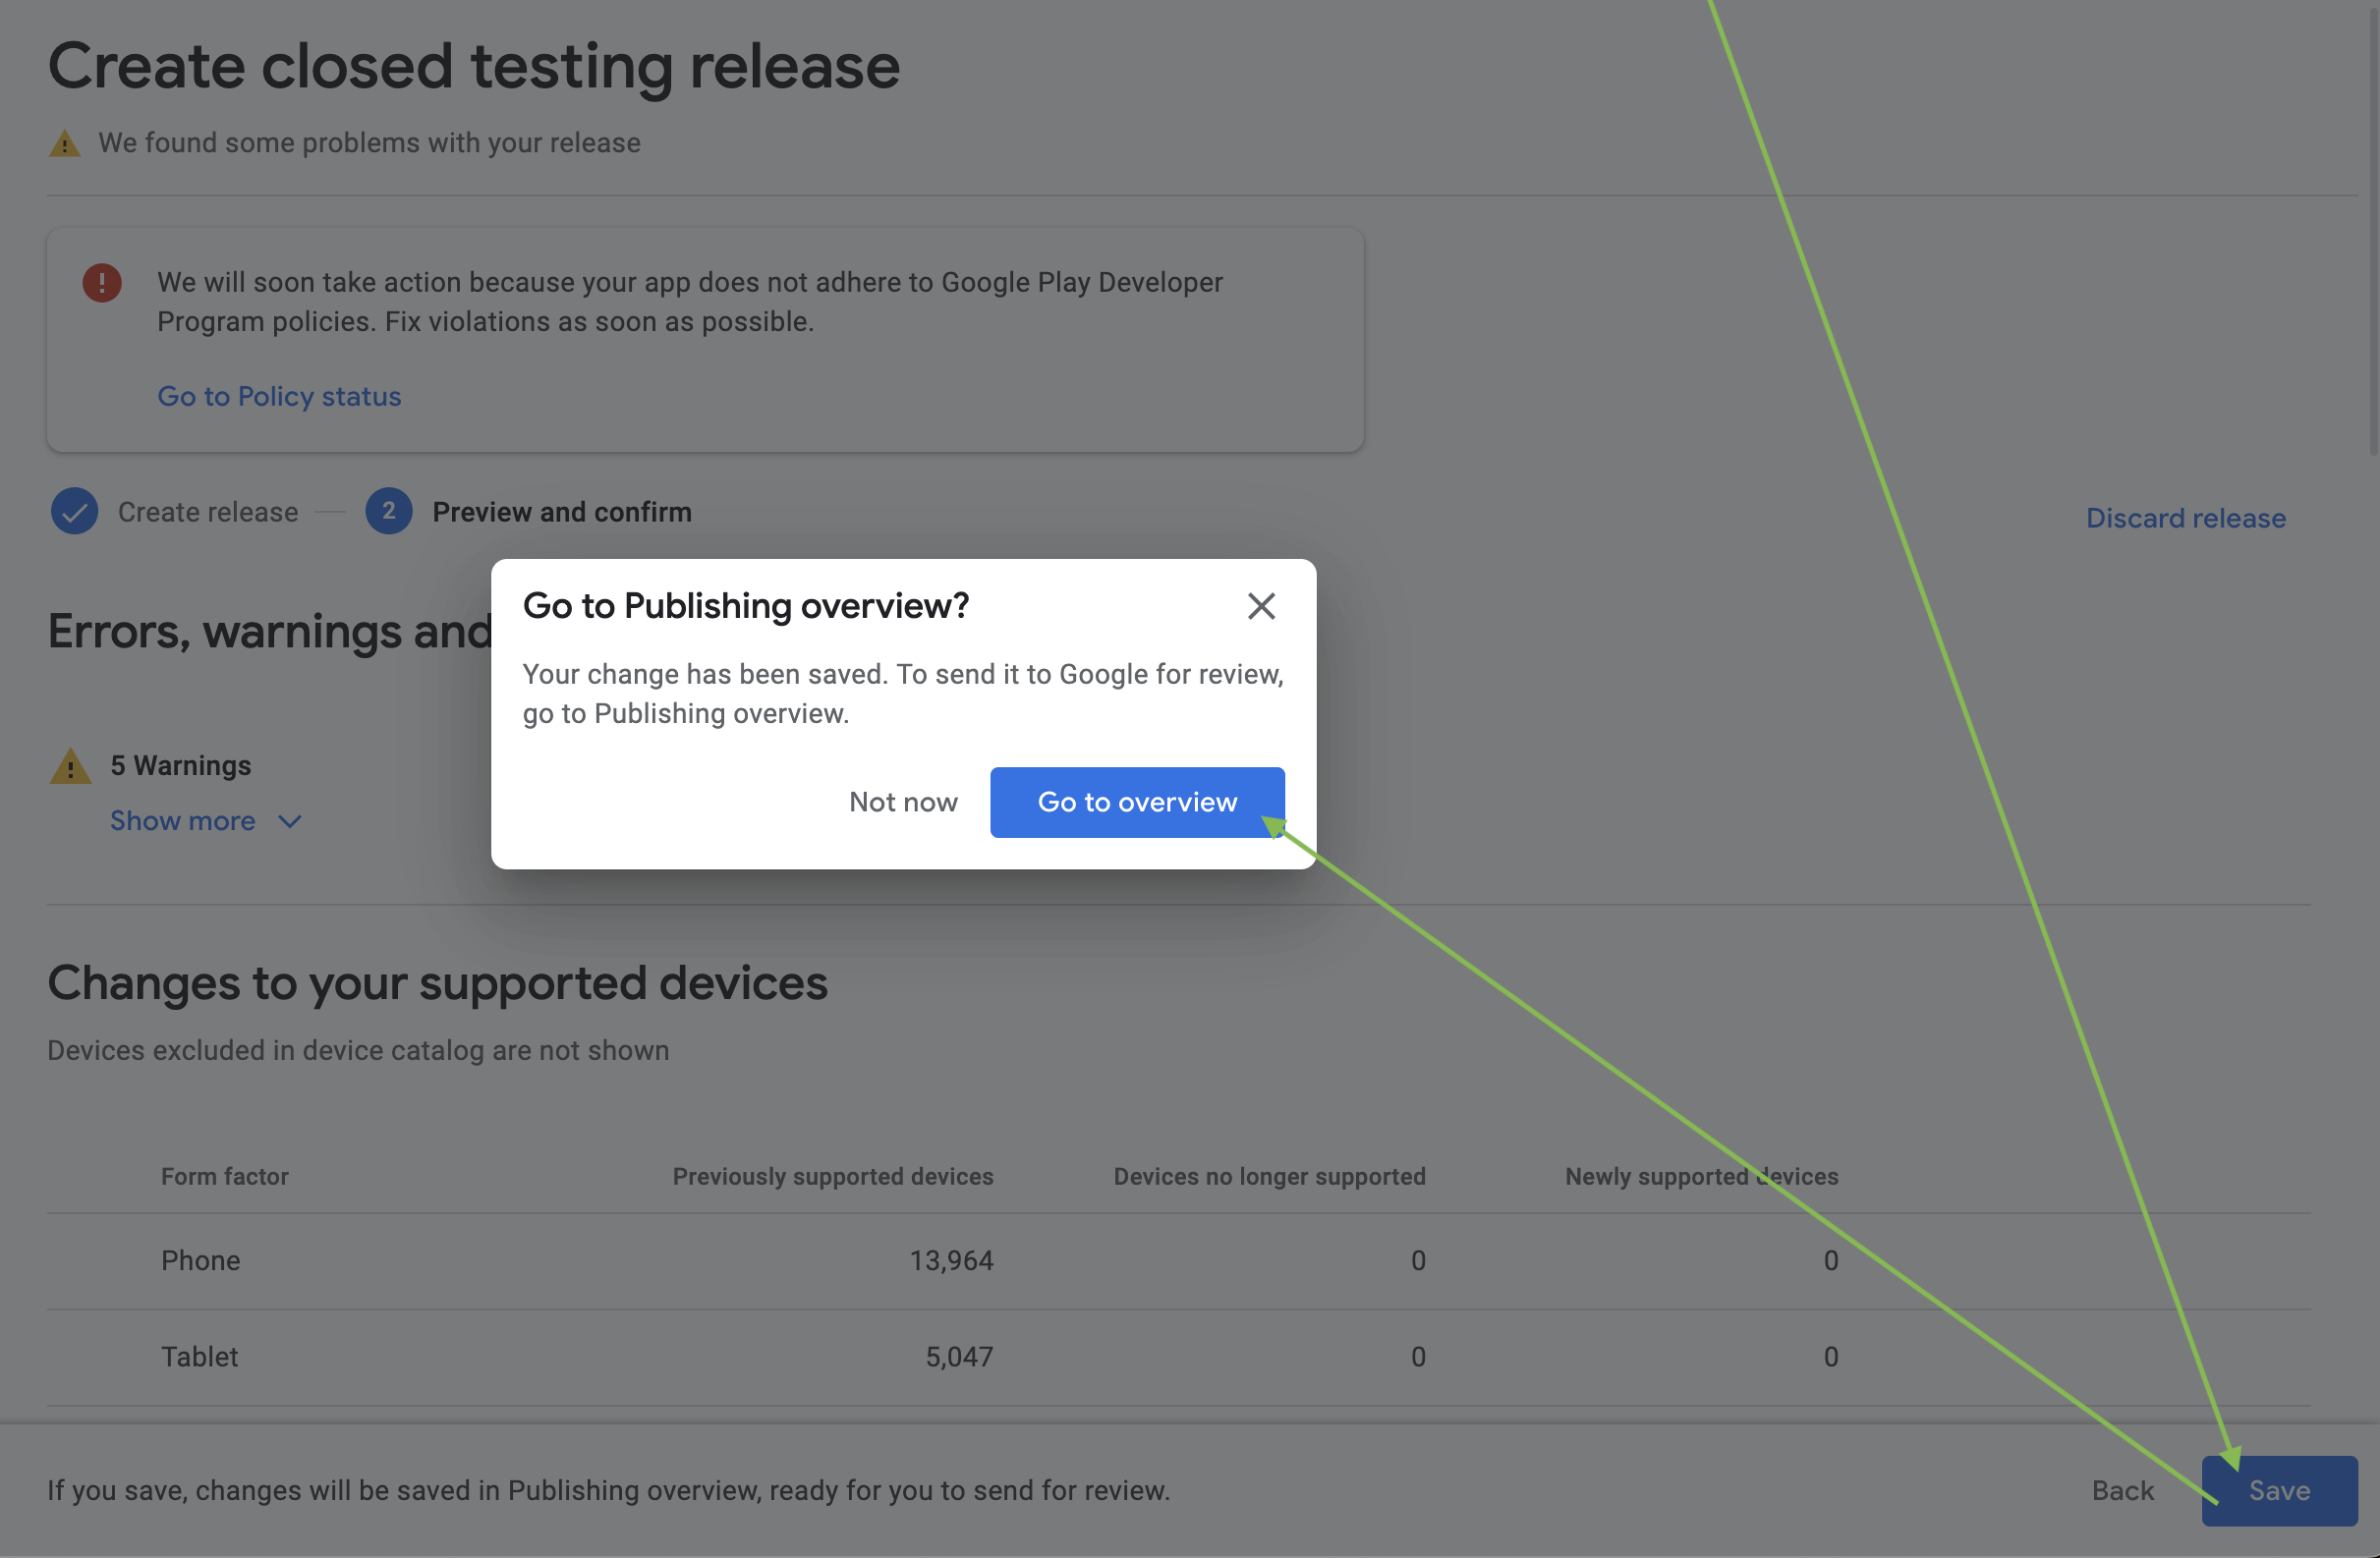
- Send Changes to Google
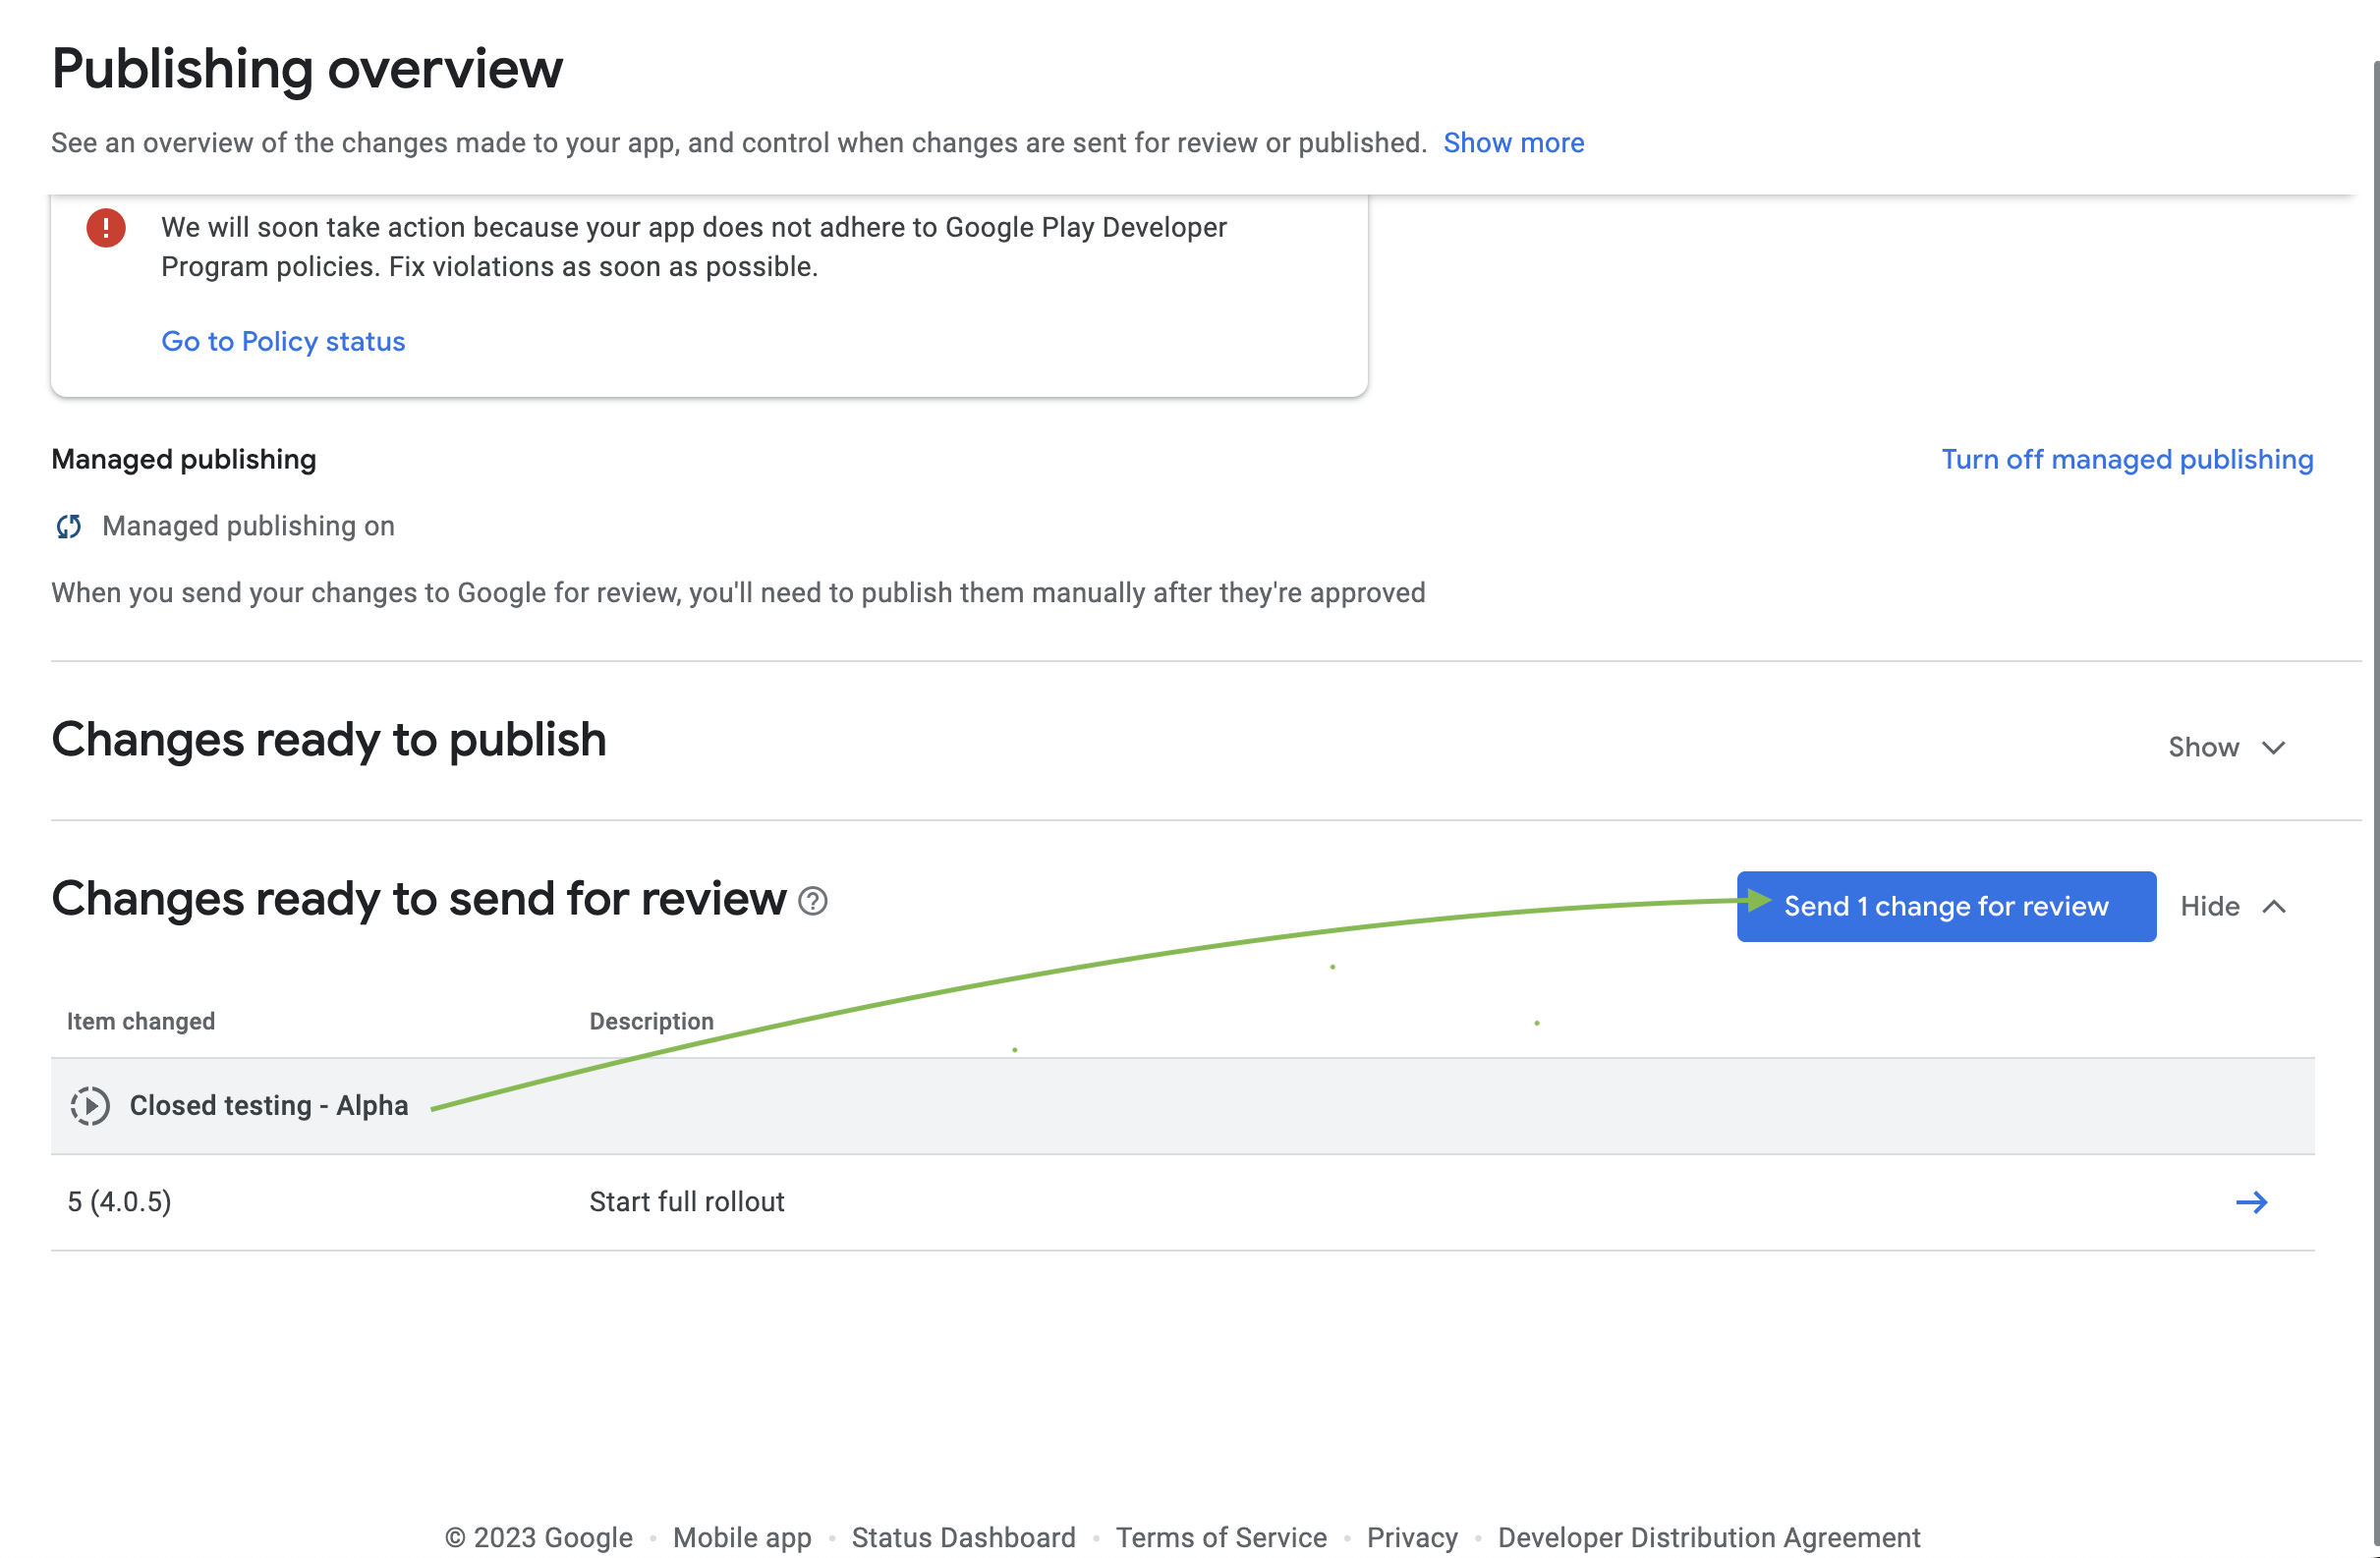
info
The review process involves sending the changes to Google for review. Reviews are typically completed within 7 days, but may take longer.
Publish the Changes
TODO: Waiting for approval