Version 1: Instructions for TinyTags App
How to add a product
https://vimeo.com/463067791/dca29e52c4
Open up the TinyTags Customization System App
- To add a product click on the + box in the bottom corner of the page
-d04204230f43a56a4cd7cbee39feea31.png)
Add text box - via star button on the bottom right hand corner of variant image box
-5e3f60c6ecab6f71009ae7b1243fc5c6.png)
Then determine the color of the text and the font that you want to operate with
-dceaab2898dc9f96b45b66180e7e24bc.png)
Limit is the number of characters that can be used.

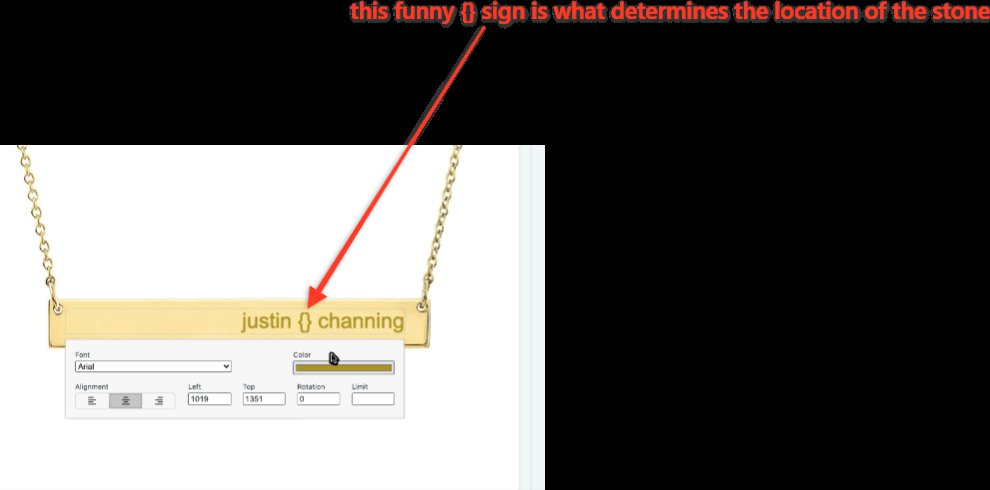
=== space-gemstone-space ==equals 3 characters
For Dog tags as an example
-9e997352ff640b197669fe36e8768ad5.png)
Text alignment options
can change default sku options
-a1badeb935b7c017c06a330bfad62c00.png)
To add a Font
- Go to Settings in the app
-585537f9c63050c33c3d8696eebe8e58.png)
- Click Add option
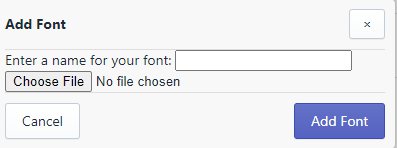
- Choose File for the font you want to add
- Click Add Font
To Save a Template
- Click Options

- Click Save Template
- Enter a name for your template for later reference

- Click Save
Also, templates will work across stores. If you create a template in the development store, it will be available in your live store.
To Delete Something While Configuring
- Click on what you want to delete

- Click the minus button on the bottom right of the page

- Then it will be deleted (that is the only functionality that button has)
Sku Options are determined by the product pages sku in Shopify

Drag Text Box to make the text smaller/larger

Upload Image- Click Text to Remove Blue Dotted Box

- Click Background Image Upload and the blue dotted text box will disappear
Add Text/Gemstone
- Click the + sign at the bottom left hand corner to add text/gemstone
![]()
How to add a chain for a product
Add a tag- it is “chain:product-handle”
That will link up a particular chain. For the sample product we had showed you, it has a tag called “chain:necklace-chain”
PDP Setting
Product Tabs on the new PDP template called Back Engraving Product
This lets you specify the product that controls the pricing for the back engraving option