How to add Product Tags in bulk in TradeGecko
How to add Product Tags in bulk in TradeGecko
You can add tags to your Products in bulk via CSV. From your Inventory page, click on the Bulk Manage drop-down menu > select Update Existing Products > click on No, I need to download a list of my products > select Product Tags under Product Attributes > Click on Build Product Sheet and Download. Add product tags for each product under the Product Tags column. If you need to add multiple tags for a product, separate each with a comma but no spaces. Save and upload the filled CSV.
https://support.tradegecko.com/hc/en-us/articles/115001760904-Update-Products-in-Bulk-via-CSV
Update Products in Bulk via CSV
To update existing products in bulk, navigate to Inventory, then click the Bulk Manage button and select Update Existing Products.
-9499adcbdbe875d19affa0e854aefe3c.png)
You will see the following screen:
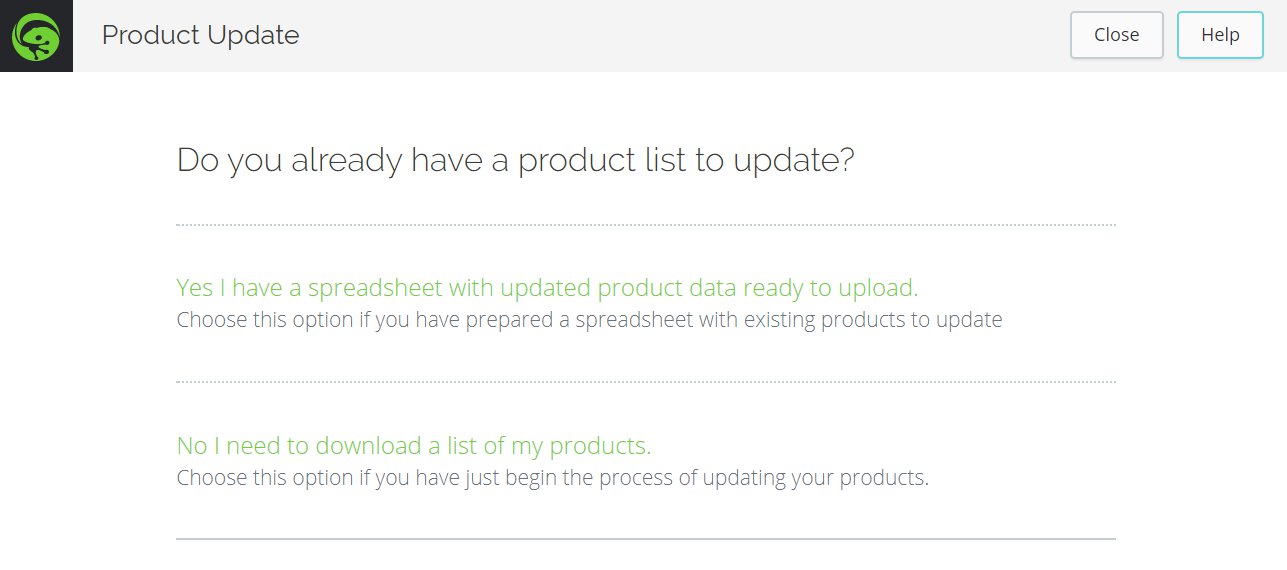
Choose if you want to upload an existing spreadsheet into QuickBooks Commerce or if you want to download a spreadsheet allowing you to edit its contents to update your products.
If you choose the No I need to download a list of my products option to download your product list for editing, you'll be presented with the attribute selection screen.
From here, select the attributes you would like added to your CSV file. Check the box if you would like to update price lists for your products at the same time. Be sure to add Price List and Sales Channel options if needed.
You can find more information on each attribute in this article.
Once done, click the Build a Product Sheet button, then when displayed, click the Download Product Sheet button to download the CSV file. If you'd like to select other attributes or start over, select the Re-build Product Sheet option.
-f0eb9fa62bfc6d1b900642adb911baf3.png)
Once you have edited the required data in the downloaded CSV file, you'll need to upload the product sheet.
Encoding your CSV files with UTF-8 to help prevent errors
If you use non-English or special characters within your CSV files, using the UTF-8 format will help to prevent processing errors when uploading to QuickBooks Commerce.
Please refer to this article for guidance on how to encode your CSV files using the UTF-8 format.
To upload your edited product sheet, select the Upload filled CSV button that's displayed after downloading the file in the previous step:

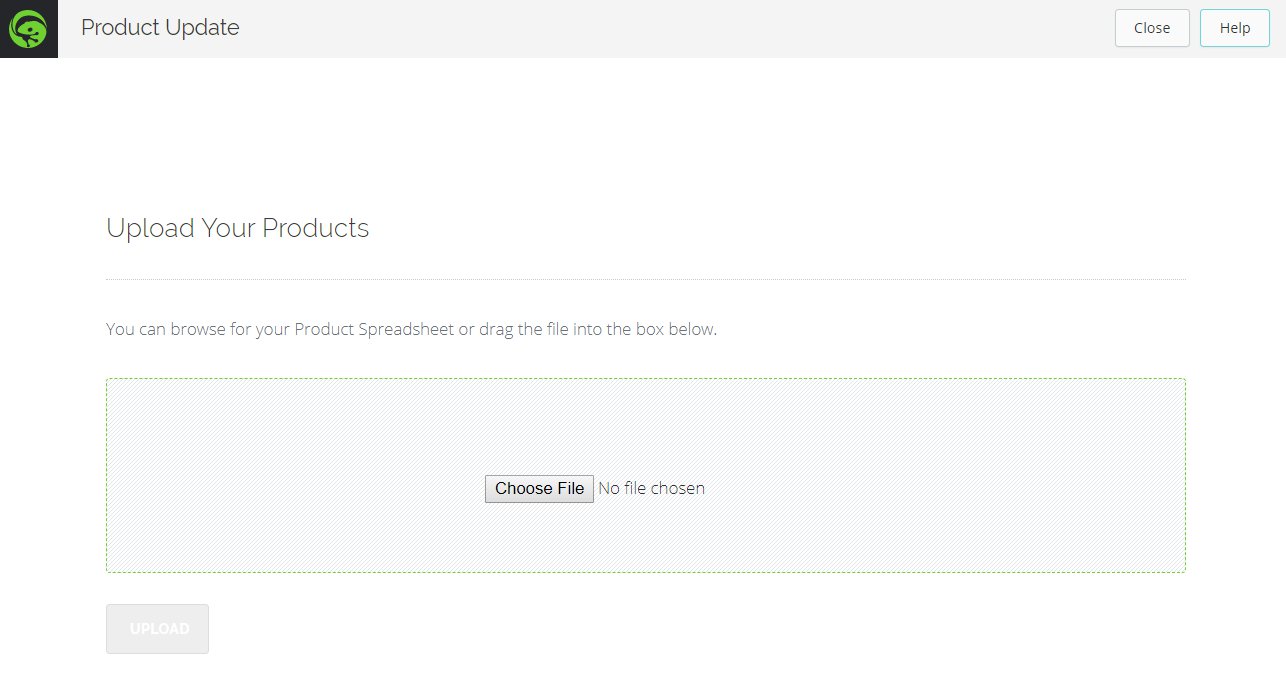
Alternatively, you can start the process again and select the Yes I have a spreadsheet with updated product data ready to upload option. Either way, you'll be presented with the following screen:
You can click the Choose File option and select your file or drag the file into the green box. Then click the Upload button.
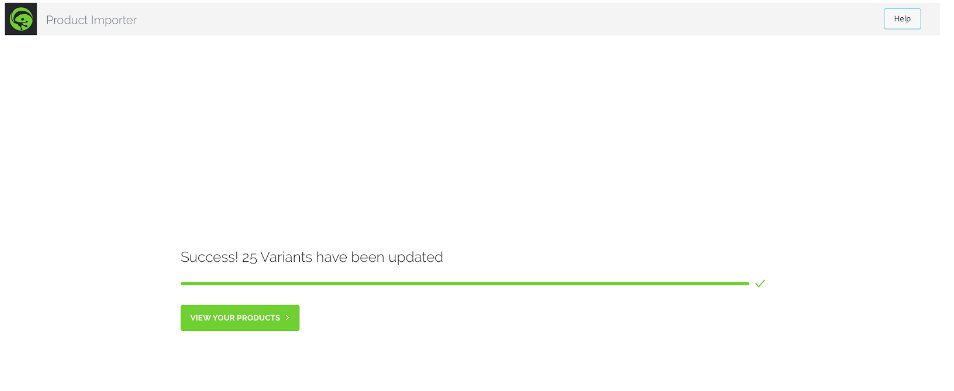
Review and Confirm the changes. If you encounter errors when uploading the spreadsheet, refer to this handy guide to resolve them.
Your products and price lists have now been updated.
How to add new variants to a product
If you want to add new variants to a product, add a new row and copy the product ID but leave the variant ID blank.
Now, add 2 columns; Initial Cost Price and Initial Stock Level.
These columns are important because we set your MAC for the new variant based on these columns. If you leave them blank, then the MAC will be set to 0. Having your MAC set to 0 is a problem when you start receiving orders because you will not be able to calculate your profits. There is no associated costs with the variant.