Configuring Azure Active Directory for StressStop SSO
You can use Azure Active Directory to allow your users to login to the StressStop website without having to register an account. In order to configure the application, follow the steps below.
Create an Enterprise Application
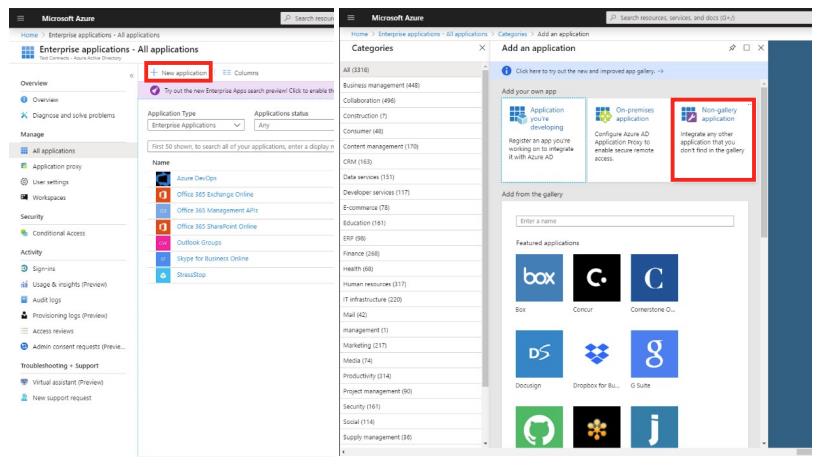
- In the Azure Active Directory administration page, click the Enterprise Applications link
2. In the top left of the page, click New Application
3. Click the Non-Gallery Application button
4. Enter the name “StressStop” in the Name field, then click Add in the lower-left corner
Configure SSO Endpoint
- In the StressStop Application Overview, click Single Sign-On in the left menu
- Click the SAML button
- Enter the following details in the Basic SAML configuration box by clicking the pencil icon in the top-left corner:

- Enter the following mapping details in the User Attributes & Claims configuration box:

- Download the Certificate (Raw) file from the SAML Signing Certificate box
- Copy the Login URL, Azure AD Identifier, and Logout URL values from the Set Up StressStop box
- Send the certificate from Step 5 and the data from Step 6 to [email protected] so they can be added to the StressStop SSO Service Provider
Final Configuration
Your final configuration should appear as show below:
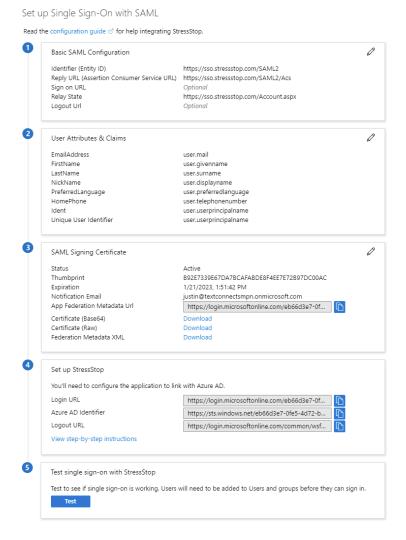
Once the certificate and other information is received and added to the StressStop SSO application, you will be able to use the Test button in the Test Single Sign-On With StressStop box to verify everything is configured correctly.