Creating a new Delivery neighborhood
Creating a new Delivery neighborhood.docx
Creating a new delivery neighborhood
- How to add another delivery location
- Log into shopify store
- Click on products in the admin panel on the left side of the page
-e339f9f30577870fe5d0154787c83afd.png)
-
- From the drop-down menu under Products in the admin panel click on collections

-
- Click Add Product on the right side of the page
![]()
-
- Create a new product with the following configuration:
- Title—delivery location
- Create a new product with the following configuration:

-
-
- Under Organization on the right side of the page select Nonna Randazzo's Bakery
-

-
-
-
- This product will be used later to map the delivery neighborhood to the order
- Double check that the following information is filled out and nothing else:
- Title: Delivery Name, e.g. Main Street Delivery
- Vendor: Nonna Randazzo
- Product Type: Delivery Zones
- Click Save
-
-

-
- From the drop-down menu under Products in the admin panel click on collections

-
- Create new collection
![]()
-
- Add title-This should be the delivery location

-
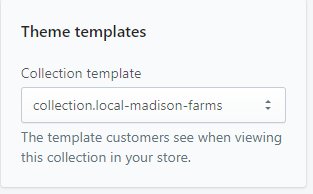
- Change Collection template to the appropriate location, for example Madison farms
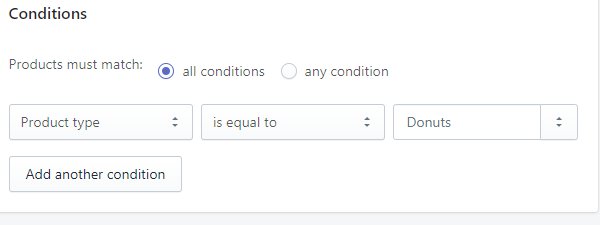
- Set conditions for the collection
- Double check that the following information has been added
- Title
- Collection Template
- Conditions
- Click Save
Add rate to Shipping Calculations for Delivery
- In your Shopify Admin, click on APPS on the left sidebar.
- Click on the Parcelify App

- Click on NEW SHIPPING RATE

- Use the following data for the fields:
Rate Name: Neighborhood Delivery - NEIGHBORHOOD NAME
Rate Description: Optional, second line of text for your customers to see.
Code:
For Local Delivery - LOCAL-NEIGHBOORHOOD
For Curbside - CURBSIDE-LOCATION
&#xNAN;Note - These MUST start with either "LOCAL-" or "CURBSIDE-", if it does not, the system will attempt to ship via UPS.
Notes: Optional, internal notes. - Scroll down to the bottom of the page and click on ADD FILTER.

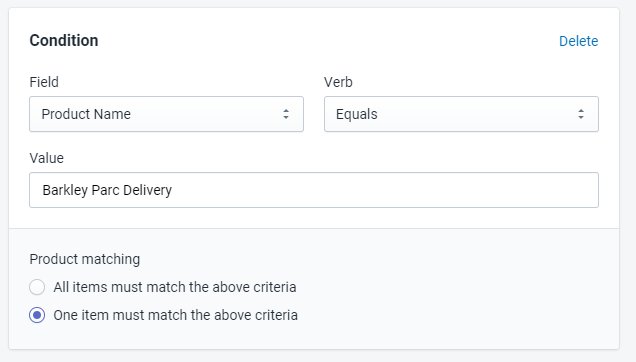
- Fill out the following settings for the filter:
Field: Product Name
Verb: Equals
Value: Use the EXACT product title you used in section 1.
Product Matching: One item must match the above criteria.
- Click Save Rate
Setup Delivery Dates + Delivery Configuration in Theme Editor

Linking the product to the collection and linking the delivery dates are the last thing to configure on the system.
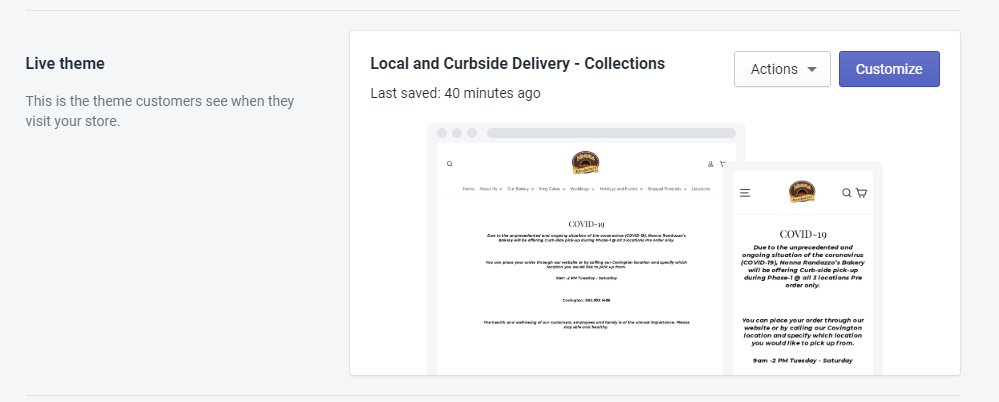
- Open the Shopify Admin
- Click on ONLINE STORE on the left menu.
- Click on the CUSTOMIZE button on the LIVE THEME
- Navigate to the collection you just created. The EASIEST method to do this, is to select COLLECTION LIST from the dropdown at the top of the theme editor

- Click on Local & Curbside Pickup on the left sidebar.

- Click on SELECT PRODUCT and select the product you created in the first section.

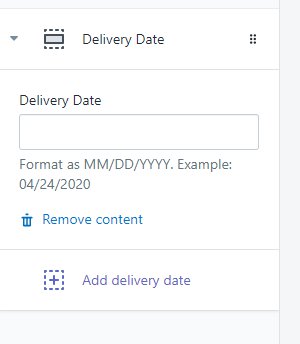
- Click on ADD DELIVERY DATE and then enter available delivery dates in the format specified - keep adding as many as you need.
- Click on SAVE

- Ready to LAUNCH! Let us know if you run into any issues while following these instructions.