Skintap Application Documentation
This documentation is separated into 6 parts.
- Application Overview
- EMR React App
- EMR Node Server
- Shopify App
- Deployment
- Extra Notes
Application Overview
Shopify Website (skintap.com)
GitHub Repo: https://github.com/Text-Connects/textconnects-theme
Shopify App (shopify app in the skintap shopify admin)
Deployed as https://app.skintap.com on port 7000
GitHub Repo: https://github.com/Text-Connects/skintap-emr
Skintap EMR (React and Node)
Deployed as https://emr.skintap.com on port 3000 for the React frontend
Deployed as https://api.skintap.com on port 5000 for the Node backend
GitHub Repo: https://github.com/Text-Connects/skintap-emr-app
Flow of Data:
- Customer places a Skintap consultation order. This order will have a line item property called _typeform which represents the typeform completed by the customer.
- The orders/update webhook registered with the Shopify App is triggered.
- Shopify order data and customer data is uploaded into the database.
- Shopify app calls GET: https://api.skintap.com/api/shopify/data-vaccuum.
- In the /data-vaccuum route, the typeform data is uploaded into the database.
- Now the data is fully in the database. The EMR will now show the new patient.
Helpful Videos
I found these videos very helpful for deploying the app onto AWS:
Deploy Node app on AWS EC2 Amazon Linux 2: https://www.youtube.com/watch?v=oHAQ3TzUTro&t=1s
Nginx Reverse Proxy on AWS EC2 Amazon Linux 2: https://www.youtube.com/watch?v=_EBARqreeao
CI/CD from Github to AWS EC2 Step by Step: https://www.youtube.com/watch?v=Buh3GjHPmjo&t=0s
Fix Common AWS CodeDeploy Failures: https://www.youtube.com/watch?v=sXZVkOH6hrA
EMR React App:
Overview:
In the skintap-emr-app repo, the frontend folder is the React application. The React app is built with React 17.0.2 and all components are functional components with hooks (if needed). It has its own package.json where you can see the dependencies.

Some major dependencies in the application include react-bootstrap and react-router-dom. All components are built with react-bootstrap and customized to the extent necessary.
The only global state in this React application is whether or not the user is logged in. The Context API is used for the global state. For Auth, there is an authenticated app component and an unauthenticated app component. If the user exists in the context (logged in), the authenticated app will render. If the user does not exist in the context (not logged in), the unauthenticated app will render.
Looking through the frontend directory, the src folder is where all the React source code is located. In the api folder you have 2 files called BaseURL and CallURL. These are simple if statements that will determine what the base url of each API call should be based on the environment (development, staging, production).
The components folder contains all the small components that are nested throughout the react application. Again, these components are built with react-bootstrap and customized to the extent necessary.
The screens folder contains all the screens in the application. Consider these the “parent” components and in these screens we have many nested child components.
The utils folder should contain any helper functions. There is currently only one helper function for date formatting but any future helper functions should go in this folder.
App.js is the parent component which will render either the authenticated app or the unauthenticated app.
Bootstrap.min.css is needed for the application as we also use bootstrap in addition to react-bootstrap. Index.css contains all the custom css classes.
Index.js is the highest parent component as with most React applications.
Lastly, package.json contains the dependencies ONLY for the React app. The React app also uses other NPM packages that are installed in the root of the Skintap EMR application, but the package.json you see in the frontend folder is ONLY for the React app.
Local Development Flow:
I recommend you use the React developer tools found here:
https://chrome.google.com/webstore/detail/react-developer-tools/fmkadmapgofadopljbjfkapdkoienihi
Prerequisites:
You must have at least Node version 14 or greater, but ideally 16.9 since production uses 16.9.
- Clone repo: https://github.com/Text-Connects/skintap-emr-app
- Open VSCode and open the terminal.
- Commands starting in the root directory:
- npm install
- cd frontend
- npm install
- cd ..
- In order to run the application:
- # Run frontend (:3000) & backend (:5000)
- npm run dev
# Run backend only
npm run server
Other Notes:
In the console you will see warnings generated by React. Most of them or === vs ==. React always wants === but there are instances where we take advantage of the == for type coercion so you can ignore the warnings.
EMR Node App:
The node app is in the backend folder of the skintap-emr-app repo. This node app uses Express.js for routing, cron for scheduled jobs, mailgun for sending emails, twilio for text messages, and a variety of other npm packages.
A couple notes on the database. We use a MySQL MariaDB database. There is a staging database and a production database. Local development, and the heroku staging build will push data to the staging database. Only the deployed AWS app will push to the production database.
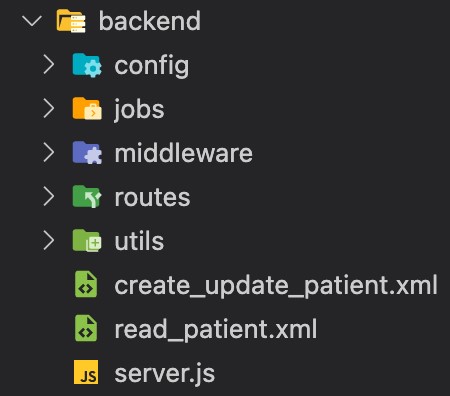
In the backend folder we have various subfolders. The config folder contains a file called db.js. This is the file used to connect with the database.
The jobs folder contains a file called notification.js. This file has a cron job which runs every 15 minutes, which handles fetching notification data from the Dr. First API and uploading the data into the database.
The middleware folder contains both auth and error middleware. The error middleware catches errors, logs them, and sends them to sentry. The auth.js middleware verifies the sessionID (session token) for every route. It will then send back a 401 if the invalid token, or the user and then next() on the route.
The routes folder contains all the api routes for the node app.
Deployment:
Deployment Summary
The application is deployed onto two separate EC2 instances and a load balancer distributes traffic among them. So each instance has the SAME application. Each time code is committed/merged into main, AWS Code Deploy (our deployment pipeline used) will execute multiple bash scripts. These bash scripts will install dependencies, build the application and start the app using PM2.
When you log into AWS Management Console and go to EC2, you will see three instances. App-1 and App-2 are the duplicate EMR applications, and the other one is the OpenVPN.
I will now go over the contents of the EC2 instance. I will use App-1 for this overview, but remember the contents of App-1 is the same as App-2.
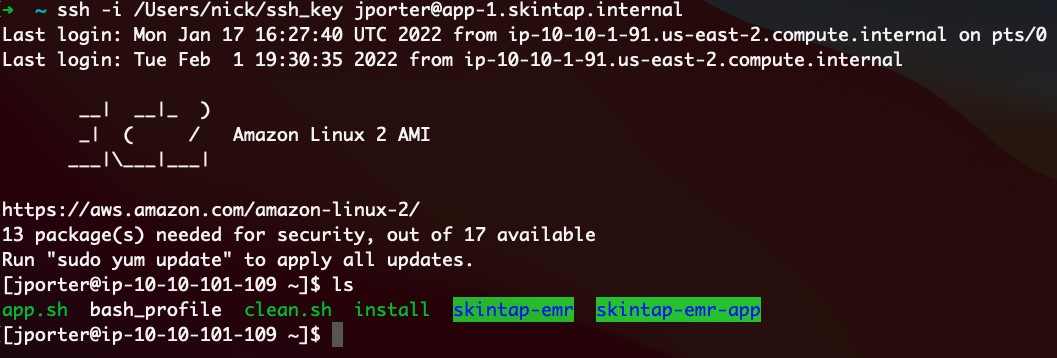
To get into the instance, you will need to SSH.
- Open your terminal
- Make sure you have the ssh_key in your user directory.
- ssh -i /Users/nick/ssh_key [email protected] (Replace “nick” with your name.)

Inside the EC2 instance there are a couple of files and folders. In green you can see the skintap-emr (Shopify App) and the skintap-emr-app (EMR application).
If you open the skintap-emr-app directory you can see the contents:

These should be the same folders and files as in local development except for a few exceptions. Server.err.log contains any errors thrown by the application. Server.out.log contains console.log output from server.js. Inside logs you can see application_start.log which contains deployment information.
All node processes use PM2. To see the list of processes, use the command: pm2 list
There should be two processes running. One is called “index”. This is the Shopify app. The other pm2 instance is called “server”. This is the EMR application (the node app).

To Stop/Restart Apps:
To manually stop/restart the node apps, use the command pm2 stop (app-name) to stop the node process and then use the command pm2 start (app-name) to start the node process.
For the react app, remember our source code is located in the frontend directory. Once the react app is built, the build code is moved to /etc/build. This may seem strange, but we must do this because of access privileges.
The deployment pipeline uses AWS Code Deploy. This allows us to deploy automatically every time a commit/pr is merged into the main branch on GitHub. You can see all the past deployments by going to Code Deploy -> Deployments.
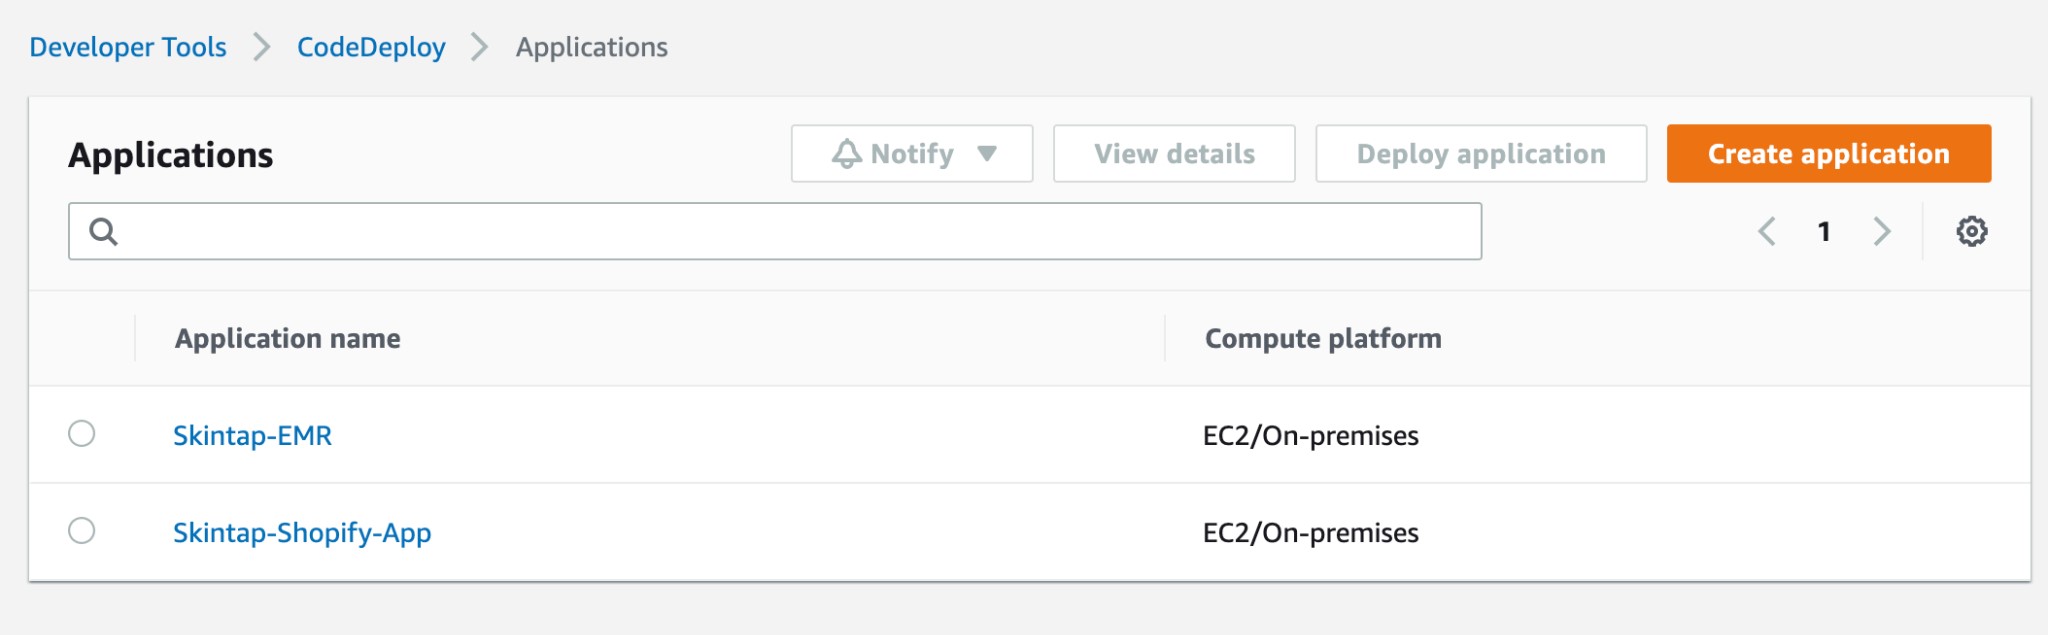
If you go to applications in Code Deploy, you can see there are two applications. One is for the Shopify App and the other is for the EMR application.
Troubleshooting Deployment
If a deployment fails, it could fail for a number of reasons. You can check deployments by going into CodeDeploy on AWS and then click on Deployments. This will show a list of all the deployments. You can click on one for more deployment details. There usually will be a reason on why the deployment failed but many times the reason will be ambiguous. This video is what I’ve used to debug most failures. https://www.youtube.com/watch?v=sXZVkOH6hrA&t=0s
The video goes through most of the scenarios you may encounter. Note that there is a strange cache issue when you update the ApplicationStop script. Timestamp to fix: https://youtu.be/sXZVkOH6hrA?t=401. Note that you will have to do this with both app-1 and app-2 instances. After doing this procedure for both, then you can redeploy.
The video is summed up as follows. For both EC2 instances (app-1 and app-2) do the following.
Note that you must start in the ROOT directory of the EC2 instance. So if you type in ls you should see something like this:
Starting in the root directory type:
sudo yum erase codedeploy-agent
cd /opt
rm -rf codedeploy-agent
cd
rm -rf (your project directory)
sudo ./install auto
Redeploy project
AWS CodeDeploy Installation
You can use this video to set up AWS CodeDeploy from scratch: https://www.youtube.com/watch?v=Buh3GjHPmjo&t=0s
I will also explain the process here:
CodeDeploy is already set up for skintap, but here is the information to install from scratch in case you need it.
Setting up CodeDeploy is fairly straightforward. First step is to just install it on your EC2 instance. SSH into your instance. If you are not sure if you have CodeDeploy already installed, use the command: sudo service codedeploy-agent status
If you need to install codedeploy, copy and paste this script into the EC2 terminal:
#!/bin/bash
sudo yum -y update
sudo yum -y install ruby
sudo yum -y install wget
cd /home/ec2-user
wget https://aws-codedeploy-us-east-1.s3.amazonaws.com/latest/install
sudo chmod +x ./install
sudo ./install auto
Once installed, you will need to complete the project setup in CodeDeploy on AWS. Login to AWS, and go to CodeDeploy (type in codedeploy in the services search box). From here you can create an application and hook up a GitHub repo. The docs for this can be found here: https://docs.aws.amazon.com/codedeploy/latest/userguide/getting-started-codedeploy.html
Config Files
There are multiple NGINX config files that are necessary for deployment. These config files are in the root folder of each GitHub repo. To access config files on the EC2 instance, they are located in /etc/nginx/sites-available
There are 3 config files: api.skintap.com app.skintap.com emr.skintap.com
Note that when you make changes to these files, they will automatically export to /etc/nginx/sites-enabled
For file editing I recommend you use nano. Nano is a text editor in the EC2 instance. Use the command sudo nano emr.skintap.com to edit the file.
Env Files
The env files in deployment can be accessed in the root directory. There are 2 env files. One is called .env and the other is called .shopify.env. The .env file contains the environment variables for the EMR and the .shopify.env file contains the environment variables for the Shopify app.
During deployment the env files are copied over to the root of their respective projects.
Shopify App:
The Shopify app is installed on the Skintap Shopify store. The Shopify app is called “Skintap EMR”. If you view the app in the Skintap admin, there is nothing shown as this app does everything behind the scenes.
The repo for the Shopify app is called skintap-emr: https://github.com/Text-Connects/skintap-emr
There is no real frontend to this application. You will see a folder for pages and some next.js stuff, but the only thing that really matters is the contents of the server folder. See this screenshot:
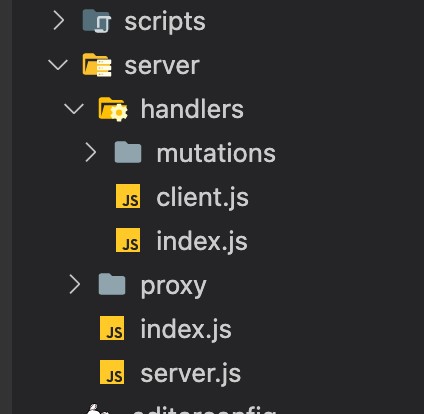
The scripts folder contains the bash scripts for the deployment pipeline. The scripts will install dependencies and start the application during deployment.
There is a proxy folder for all the proxy helper functions. See Ben for more information regarding these files. The server folder contains the server.js file which handles 80% of the logic regarding the app.
There are two databases, one for staging and the one for production. This is why there is a pool cluster like this on like 53:
// // DB Connection
// 2 Connections
let poolCluster = mysql.createPoolCluster();
poolCluster.add("production", {
 connectionLimit: 50,
 host: process.env.PROD_DB_HOST,
 user: process.env.PROD_DB_USER,
 password: process.env.PROD_DB_PASSWORD,
 database: "skintap",
});
poolCluster.add("staging", {
 connectionLimit: 50,
 host: process.env.STAGE_DB_HOST,
 user: process.env.STAGE_DB_USER,
 password: process.env.STAGE_DB_PASSWORD,
 database: "skintap",
});Some code
Depending on the order that comes in, information will be sent to either staging or production. The determination is based on the email address of the customer order. The email domains "skintap.com", "textconnects.com", and "digitalretailpartners.com" will all be sent to staging. Any other email domain will be sent to the production database.
Extra Notes:
These are some extra notes that may be helpful.Shopify App:
Ngrok subdomain for LOCAL development: ngrok http -subdomain=skintap 80
EMR App:
During development, nodemon is installed so you shouldn’t have to refresh when you save a file on the server side. However, if something you expected to update did not update, simply refresh the page.
EC2 SSH Access:
Open Terminal
Make sure you have the ssh_key in your user director, then use this command. Replace “nick” with your name.
ssh -i /Users/nick/ssh_key [email protected]
Typeform Request API Calls:
For api calls to typeform, this should be in the header:
Authorization: Bearer CPi8ncyHbyRJxNdb65Gi4eJNUMAMT6LcKCZ8Un7n2xrg
Other Tools Used:
DBeaver is used as DBMS with the MySQL MariaDB database.
Package Versions on EC2:
These are all the versions of Ruby, Node, etc on the EC2 instances that should be in use.
RUBY - 2.0.0p648
NODE - v16.13.1 (16.9 can also be used. Use NVM use v(whatever version) to switch.
NPM - 8.1.2
NVM - 0.34.0
IMPORTANT NOTE:
The EMR application uses the Dr. First API to manage prescription handling. When making any changes that involve Dr. First calls or displaying prescription data that is from Dr. First, you must fully understand that you are not exceeding the limitations set by Dr. First.
If a user is stuck
If a user is stuck and unable to log-in, have them go to https://api.skintap.com/user/logout and that will clear all the EMR cookies. They should be able to login after that